
Today I want to share with you how I altered this cute clear bag...
Christmas Gift Altered Container

Christmas Gift Altered Container
this container originally housed some buttons. I love how cute, small and clear it is. I can include some small treats in it, add a gift card or even a beautiful jewelry set. The gift possiblities are endless! So here's how I made this super easy project...
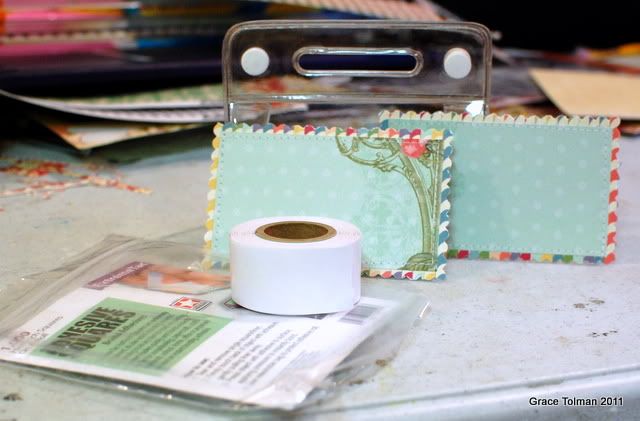
1. I started off with measuring the front and back side of the bag. I had cut out pattern papers to measure abuot 1/4" smaller than my initial measurement. Then I added this paper to another pattern and then trimmed that with scallop edge scissors. I also added some machine stitching to the edges of both paper pieces. Then I added them to the bag using some extreme square adhesives.
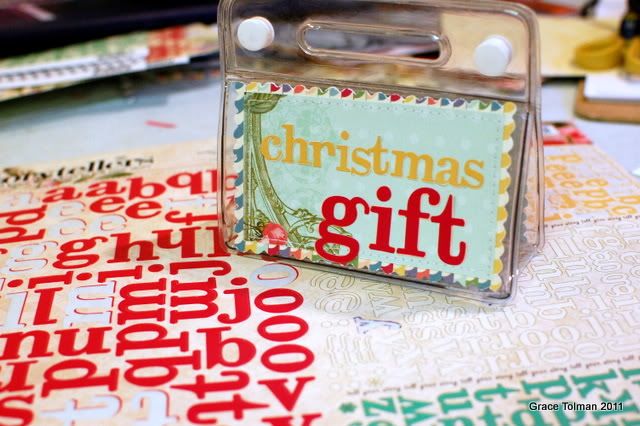 2. then I used some letter stickers that came in the Webster's Pages collection kit that I was using for all three containers.
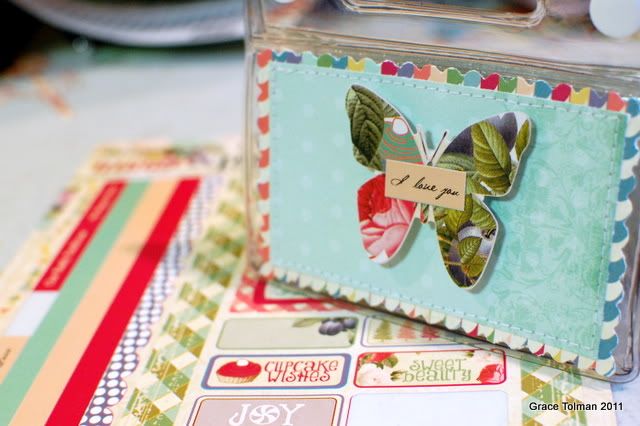
3. I also added some stickers to the back of the bag. I adhered the big butterfly sticker with some foam adhesive to give it more dimension.
 4. then I added some flowers on the bag. I used some mini square adhesive to adhere the flowers.
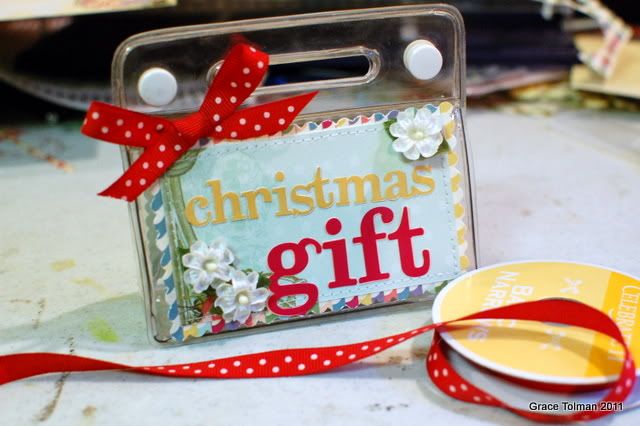 5. After staring at this project for a few minutes, I felt like it needed some bow to it. So I added some red dot ribbon to the front of the bag.
 Now it's all complete and ready to be filled with goodies and great Christmas gifts.
Make sure you check out tomorrow's blog post for our final edition our tutorial posts.
Till next time,
Grace
7 comments:
love this especially since i have that bag in my stash right now, great way to gift my DD
Great recycling! This is the cutest gift bag ever! I will definitely keeP this in mind for my next gift giving!
What a great idea, there are so many containers we all have like this that could be reused.
I adore that what you've done with the packaging - I think it's brilliant!
So cute projects! TFS! Hugs.. Maggy
I just love the way you re-purposed this little bag and dressed it up with papers and ribbons. Your ideas for items to place in the bag were also inspired. Thanks!
I love the little gift container... it's adorable. Thanks for sharing.
http://racincrafts.blogspot.com/ or
racincrafts at aim dot com
Post a Comment