Hello friends. Today I have a fun project to share. Since Valentine's day is right around the corner, I hope these projects would be inspiring to you and would get you into the "love" mood.
Today Glue Dots Creative Makers are teaming up with Lawn Fawn Stamps for a special blog hop. I used this new stamp from LF as the basis of my projects....
Unfortunately it is sold out on their site. But check back with them soon to see when they can get it back in stock.
And because I love my blog followers, I have a special "extra" project for you today.
If you wanna check out how I made these treat envelopes via video, press play below...
And here are the written instructions...
Valentine’s Day Treat Envelopes
Designed by: Grace Tolman
Time: Approximately 30 minutes
Level: Intermediatte
Size: 2 boxes at 3 ¼ x 3 ¼ x ½ , 1 box at 3 x 4 x ½
Notes:
Materials
• White Cardstock- Solar White, Neenah Cardstock
• Pattern papers- Let’s Polka in the Meadow, 6x6 paper pad, Lawn Fawn
• Twine- Source Unknown
Tools:
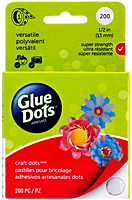
• Craft dots, Glue Dots®
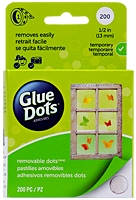
• Removable, Glue Dots®
• Ink- Black, Hybrid, My Favorite Things; (Lemonade, Grape Soda, Bubblegum) Lawn Fawn
• Stamp- How you Bean? Conversation Hearts Add On, Lawn Fawn
• 123 Punch board, We R Memory Keepers
• Label die- Stitched Label set, Lawn Fawn
• Scissors
Directions:
1. Create the envelope with the 6x6 paper pads and the 123 Punch board tool. Adhere three of the four flaps of the envelope onto each other using some Craft dots, Glue Dots® adhesive.
2. Cut out the label from white cardstock and the Lawn Fawn stitched label die.
3. Stamp a heart and the sentiment using colored ink (for the heart) and a black ink (for the sentiment).
4. Place the treat inside the envelope. Adhere a dot of Removable, Glue Dots® adhesive onto the open flap of the envelope to close it.
5. Tie some twine around the treat envelope and tie the ends into a bow.
6. Adhere the label onto the treat envelope using more Removable, Glue Dots® adhesive.
7. Repeat the process for as many treat envelopes as you need.
Have a great crafty week.
Till next time,
Grace


