Everyone has a story to tell, here's mine sprinkled with some creative projects along the way.
Thank you for stopping by and I hope you come back again.


Thursday, October 13, 2016

"Father's Blessing" layout

Happy Thursday friends. Today I'm going to share one of many pages that I've  created recently. I love the beginning of the month cause then I get a new set of challenge prompts to work with. They are my favorite ways of branching outside of my comfort zone and even using some items that I've forgotten/neglected to play with. 

Today's page was inspired by a sketch from The ScrapRoom kit club blog


If you can believe this, all of the items on this page except the white and dark brown cardstock is from my scrap stash. That circle paper one is from years ago. 

I also entered this at the Paper Issues Facebook group Take 5 challenge. In this challenge, you are given specific prompts and you are to pick five out of that. I chose Cardstock, 3 Pattern papers, stars, white cardstock and mixed media.


For the mixed media, I used a star stencil and white modeling paste to add some texture and design to my red cardstock strip.

So that's it for me today. Make sure you stop by tomorrow for another page share.

Till next time,
Grace

Wednesday, October 12, 2016

Glue Dots and CardMaker's blog hop

Hello my dear crafty friends and welcome to my post for the Glue Dots and CardMaker's magazine blog hop. Before I go on with my projects, I wanted to let you know that there is a giveaway prepared for this blog hop. The form to enter the giveaway will be at the Glue Dots blog (the last one on the hop). And it will be open for a whole week. 

Here's the line up for the blog hop...
YOU ARE HERE >>>>>>Grace Tolman <<<<<<<<<<<<<<

I love this time of the year. The crisp fall weather, the candies and cute costumes and of course the fun papercrafting projects we can make along with the holiday theme. Today I wanted to share with you thought that by focusing on the color and texture choices, you can create some fun Halloween gift boxes and cards without having to invest in too many Halloween themed products. 

Below is a picture of the items that I had pulled out of my stash to make my projects....

And here's my first project....
I love to make gift and treat boxes around the holidays. They are the perfect little touch to add some personalization to your gifts. Plus they help me use my every growing stash. Win-win!

Here's a video showcasing my process for the project...


Directions for the box...
  1. Cut a piece of cardstock measuring 7x12"
  2. Score the piece horizontally at 1", 2", 5", 7", 10" and at 11"
  3. Turn the paper vertically and score at 2" and at 5"
  4. Fold the paper to emphasize the creases
  5. Cut the 2x4" corners of the paper. 
  6. Cut a slit on the block between 5" and 7" up to the 2" vertical mark. Cut 1" off the panel. 
  7. Punch a decorative border on the ends of the box (the top flap)
  8. Assemble the box using Glue Dots adhesive. 
  9. Cut some pattern papers 1/4" smaller than the box panels and adhere these papers onto the box using more Glue Dots adhesive. 
  10. Die cut a circle from glittered cardstock using some steel die. 
  11. Adhere the tree and add the stamped sentiment over it. 
  12. Punch two small holes on the top of the box using a hole puncher or the Crop-a-dile
  13. Thread the twine through and tie into a bow. 


And here are some close ups....


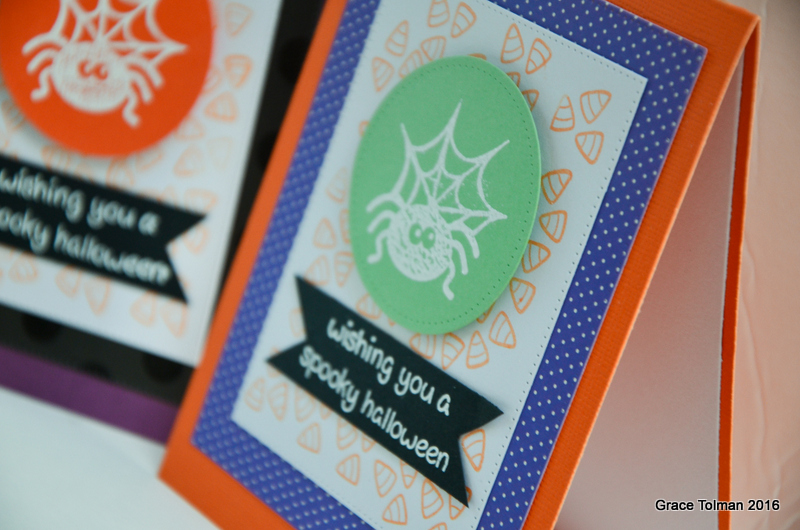
And since I already had the items on  my table, I decided to use the leftovers to create some Halloween cards as well....
The video didn't show my whole process. Sorry about that. But as you can see, it doesn't take too long and much effort to create these cards. My favorite part of these cards are my stamped paper block. I was able to make my own patterned paper with the help of stamps. With that technique, you can pretty much personalize any card to fit your theme or sentiment.

And here some more close ups...

Thank you for stopping by.

Make sure you stop by at Janet Van Lone Trieschman blog next.

I hope you'll have fun hopping along today and hope to see you come back to my blog soon.

Till next time,
Grace


Wednesday, September 21, 2016

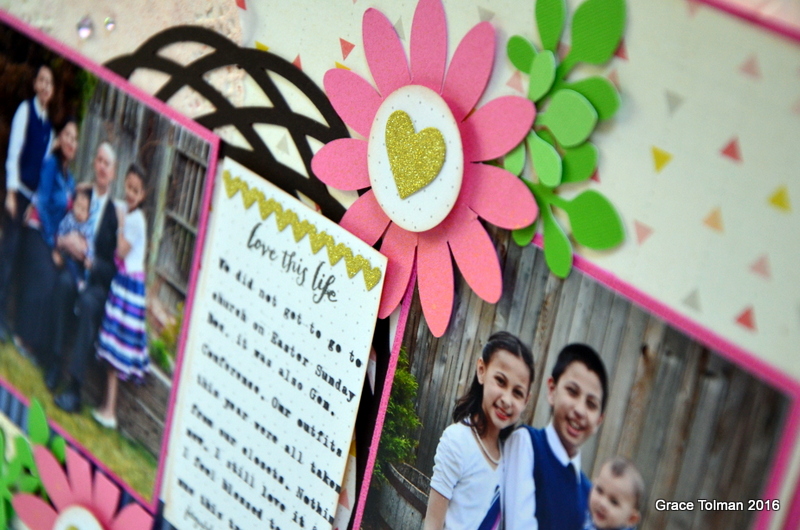
"Wonderful Memory" layout

Happy mid week everyone. Today's share is a layout inspired by the following sketch from Creative Scrappers. 

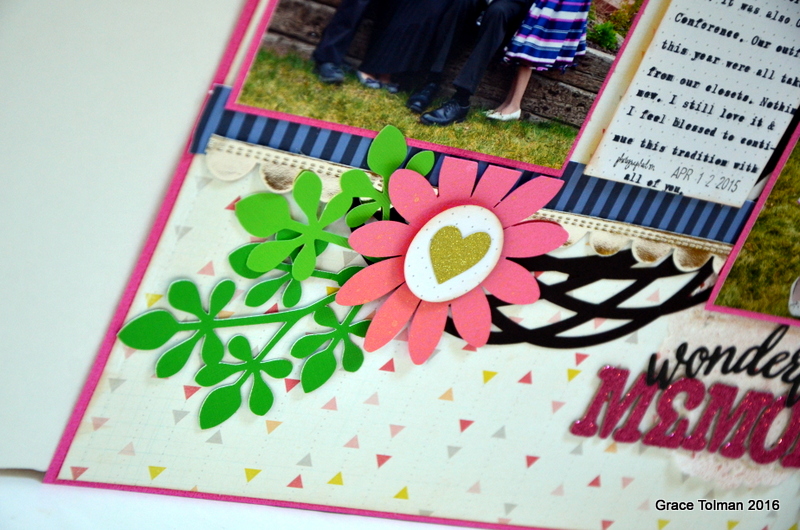
I liked the circle accent and I just happened to have the die cut accent already cut so I used that for the circular image. I also added some more die cuts created from my Cameo like the leaves and flowers. I've been rummaging through my stash lately and it feels good to pay attention to the items that I've neglected for a while now. 

The sketch called for three blocks with one for the photo. I happened to have two photos for this specific memory so I used the left and right blocks for the pictures. I used a skinnier center block for my title, which I dressed up with some stamping and heart dies cut from glittered cardstock.

The word "wonderful" was cut from black cardstock using a steel die from Echo Park.

I liked how the green leaves coordinated with the grass in my photos.

I added some doilies for added layering but sprayed them with some ink first so that they will be a bit more noticeable versus in their plain state.

So that's it from me today.

Thanks for stopping by.

Till next time,
Grace

Tuesday, September 20, 2016

"Celebrate" layout

Hello again my crafty friends. 

The following page was inspired by this month's Mercy Tiara's 27-day challenge. The prompt was to create a DIY background and use that in a layout. 

The white piece with various shaped papers and heart accent was initially created for a page I wanted to make a couple of months back. However it seemed to busy for that original page and so I just set it aside. I pulled it back out again this month and decided that it would fit better for this page. 

To tone down the busy background, I added a piece of vellum in between the diy background and my photos and title. I also used some Simple Stories letter stickers to complete my title. I like how the rainbow colors of the title matches the rainbow colors of the background piece. 

The hearts were created with a stencil and some textured paste tinted with some yellow acrylic paint.

I also added some punched out stars from glittered cardstock for that extra "celebration" accent.

Thank you for stopping by. Please check back again soon.

Till next time,
Grace

Monday, September 19, 2016

"Crazy Kid!" layout

Hello friends. Sorry I've been a bit MIA on this blog. School started up again for me and I'm still trying to get used to a new, more rigid schedule. 

But one thing I do know...I cannot turn my back on scrapbooking. It's my creative outlet and we all need that something that calms us down. 

The following page was inspired by the latest sketch from GrandDiva's Creative Corner...

As well as the September This and That challenge from Rochelle Spears' blog...

This page would make the best sense once you read the journaling and it goes...
"February 2, 2016. Sometimes I forget how much danger a little guy like you can get into. This morning, while I was working out, you decided to go into the laundry room and climb up on our little pantry shelf in the corner. You had climbed all the way up to the top shelf and managed to pull down my bag of Sushi rice. Of course in the minutes that followed, I had to stop by workout video, pick up whatever else you dropped and cleaned up the spill. You might wonder where you were during the disaster clean up period. Well I banished you in the pack and play and tuned out your cries. Oh my dear son, I don’t know if you’ll ever remember moments like this but I want you to know that despite my anger at that time and the damage you made, I still love you. Just don’t waste expensive Sushi rice again, please! Love, Mom."
This was one of those mornings! 
I deviated a  little bit from the sketch since I only had one photo and I didn't want to turn it into a circle shape. I also had to move the big banner piece cause I did not want to cover the camera and word section in my grid paper background. 

I trimmed a 3x4 pocket card and used that as my title. I did add some circles to the page but used it as visual triangle instead.

I used some enamel hearts and arrows from My Mind's Eye for this page. I also added brackets to my journaling to add emphasis to it.

Thank you for stopping by and I hope you have a crafty day.

Till next time,
Grace

Wednesday, September 7, 2016

"Love Every Piece of You" layout

Hello again dear friends. Today I'm sharing another baby page and this one was inspired by the latest sketch over at Stuck?! blog. Oh and make sure to check out their blog this month. They are celebrating an anniversary and promises to have some extra fun surprises (with awesome sponsors) this month. I know I will be checking often. ;)


I love, love, love this photo. My scrapbook philosophy has always been that most stories cannot be told by just one photo. However, there are also some photographs that require their very own page, because these images just melts my heart and no other "companion" photo can help with the story. 

The picture in this page is an example of that. When I got this print back, I stared at it for a good 2 minutes. I just love how I was able to capture my baby (which is now 2 years old) at this age. I don't want to say that I miss that stage because I love watching him grow up, but I do miss his sweet face when he was a baby. 

Anyways, I used a bunch of scraps of paper for this page. I cut out the "love" title from my cameo machine using a free calligraphy font from dafont.com.

I also used a "new to me" stitched rectangle nested die from Memory box for the journaling blocks as well as the two big blocks peeking behind my photo.

I also stamped some hearts from an Amy Tangerine stamp set as my embellishment. I wanted this page to feel complete but without too much "stuff" in it so that the photo can stand out and "shine".

So there you have it.
Thank you for stopping by and I hope you swing by again.

Till next time,
Grace

Tuesday, September 6, 2016

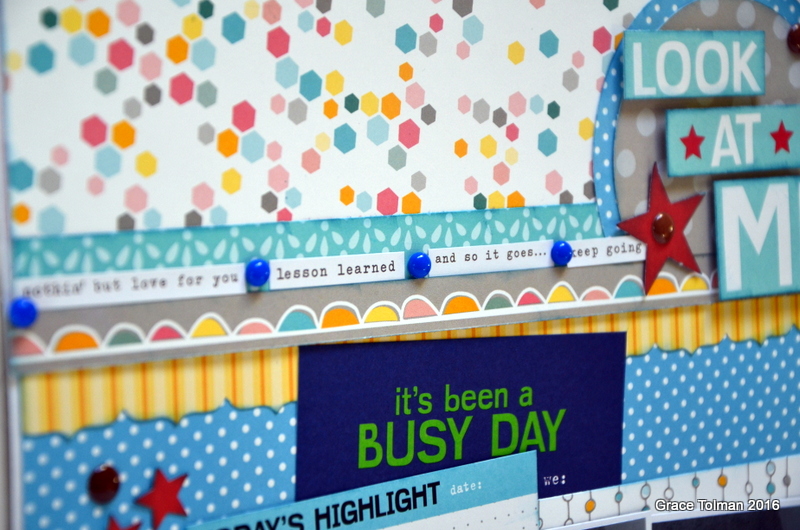
"Look at Me" layout

Hi guys and happy Tuesday. Hope you all had a great Labor Day Weekend (for my US friends) Anyways today I'm sharing my latest page. This one was based off of the latest sketch from Sketch N Scrap blog. 


I flipped my page so that the title is on the top and the photos are on the bottom. I used some papers from American Crafts and Recollections (the blue dot paper on the bottom). I also had some 3x4 and 4x6 pocket cards from MAMBI that I used, tucking in two of them behind the photo collage and then cutting up one to use as my title. 

Here are some more close ups....

I also entered this page at a sticker challenge over at Scrapbook.com forum. I used some phrase stickers from Simple Stories as one long strip on the top. To put a division between each phrase, I added some homemade enamel dot in between.

Thanks for stopping by.

If you have any questions, don't hesitate to leave them in the comment section below.

Till next time,
Grace

Monday, August 29, 2016

Our little guy is 2 years old

Hi friends. I'm breaking away from the scrappy shares to post some of my favorite pictures from my photo session with our little Mason. He turned two last Thursday and being that his mama is a photographer, it was just natural that he got his special photo shoot. I am actually beyond grateful that I have this skill and also that I did this on the morning of his birthday. His birthday gift was a trike and on Friday morning, he decided to ride it down a small flight of stairs and made some big damage with his face. (insert sad face here). Oh the joys of being a parent to a busy toddler!

Anyways, here are some of my faves....


 This boy loves to read so it was just natural to have some shots with his fave books.


 I love that he was excited in this shot. I'm not sure if it's pure excitement for his birthday or due to the fact that I was sugaring him up (giving him little jelly beans) throughout our session. If you have ever had a kid session with me, then you know that that's my secret weapon to connect with a child. ;)

I think I'll blow up this one. It's so him right now. That little happy smile with eyes sparkling as he discovers more about the world around him. I also love how in this photo, he was actually looking at me. That's a rarity these days.


So that's it from me today. Our little guy looks so grown up and my heart is aching a bit. How do you mamas take it all in and not let time pass you by? I feel like time is moving at a lightning speed with this guy.

Thanks for stopping by.

Till next time,
Grace