Everyone has a story to tell, here's mine sprinkled with some creative projects along the way.
Thank you for stopping by and I hope you come back again.
Monday, September 28, 2009
Check this out!!!
" Hey everyone,
Today GCD has SOME BIG NEWS about NEW product! We have a new designer on board and we can't wait to tell you all about it today!!!! Starting on Monday and going to Wed... we are sharing our new collection! We hope to see you at our blog "
hurry, hurry, hurry!!!
click here!
Till next time,
Grace
Friday, September 25, 2009
Ms. Speedy Gonzales
have you ever finished 9 errands in one morning? well I have. I was little ms speedy Gonzales this morning, and I even amazed myself. These are the things I was able to check off...
1. drop off son to school
2. pick up car seat at my parents house
3. get tb test proof of immunization from Kaiser
4. pick up prescription
5. get last minute food for our camping trip tonight
6. go to JCPenney and use $10 off coupon and scored some awesome deals (got two tops and a dress and paid only $4.40 for all of them!)
7. go to my work and pick up check plus check schedule for next week
8. fill up car with gas
9. drove to hubby's work so we can switch cars. I took the ranchero home while he kept the expedition so he can load the canoe on the car.
I left my house at 8 am and got back from all of this running around at 11:30am. Not too bad, don't you think?!
Now if I can only do laundry this fast, I'd be a happy lady! LOL
So like I mentioned earlier, we are on for our camping trip today. We are taking the kids to Silverwood lake and do some canoeing tomorrow. I'm excited and of course a little nervous as this is my first time being in a canoe. I'm just praying that all our life vest/floating devices work and that Mitch will be able to rescue all of us incase we drown!
Our expedition got fixed yesterday and it's running good but it came with a hefty price! After Mitch came home from the Auto shop he said that there will be no Christmas in our house this year cause all our money went to the car! That's kinda sad but I know that with or without gifts we will still have a great holiday season. (wow those self help books are really helping cause I wasn't this optimistic before! LOL)
Anyways if you don't hear from me this weekend, you know where I am.
And before I say bye, make sure you check the GCD Studios blog for your chance to win a great prize. How great? Oh just $100 worth of products!!! So what are you waiting for? Head on over there right now!!!
Till next time,
Grace
Thursday, September 24, 2009
This is happiness
Hi all (waving at you with a big smile on my face)
If you stopped by to check out the rest of my GCD Studios and Graffix projects, click here.
So this is my last crafty post for today and I saved the best for last. Or so I hope!
This is Happiness
this one was inspired by the latest challenge over at the American Crafts Studio blog. This week we were to use two or more AC Elements products on our layouts. I was totally on for this challenge cause I have TONS of Elements lying around.
I used one of those picture templates for this one and I have to say, I'm liking it! The fact that I can download them for free, drop my pictures in the boxes and viola.... an instant picture block! I love it! This template came from here.
I wanted to incorporate the journaling inside the picture block so I left one square blank, added pattern paper on it and then added my journaling.
I cut out the flowers from pattern paper using the Cricut and layered it with My house flowers plus Elements brads and buttons. I added ribbons for stems and attached them with machine stitching.
Supplies used:
Cardstock- Die Cuts with a View
*Pattern paper- Brown dot- Everyday; Green floral- Ala Carte; Dot and stripe- The Goods; Green solid- Play
*Flowers- My House
*buttons, brads and ribbon- Elements
*Puffy letters- Thickers
*Flower rubon- Mini Marks
Frame rubon- Basic Grey
Label maker- Dymo
Journaling font- Century Gothic, MS Word
Others- Thread and Sewing Machine
*American Crafts Products
Thank you for looking
Till next time,
Grace
Friendship card
Thank you to all my new visitors to this blog this week. I know most of you have come from the GCD Studios blog and I appreciate you all and your sweet words. I hope you come visit again. :)
Anyways here's a card that I just finished for the Get Sketchy challenge this week. It seems like I have all the good intention in the world to get my challenges done in the beginning of the week but somehow fell off the wagon and in the "last minute" rush again. Oh well!
Friendship isn't a big thing- it's a million little things
The bonus challenge was to not use any pattern paper. Ok at first I was game for this challenge. I figured with a bunch of rubons in my stash and a few stamps here and there, I can get this done in a snap. Boy was I wrong! I didn't realize how dependent I am on pattern paper!
At the end I was getting a little snappy at the kids who were asking me for all sorts of favors. I wasn't really annoyed at them pulling me away from my project, it was more that the project was taking longer and more challenging that I've anticipated!
But I persevered and here's my attempt to making a card without any pattern paper.
Instead of the stars in the sketch, I used butterflies and popped them out a little more with pop up dots.
Thank you for looking.
Till next time,
Grace
Rest of the GCD + Graffix projects
Have you been following our fun GCD and Graffix share this week. If you have not, check the GCD studios blog and start there.
Today is the day we share the rest of our projects. Here's mine.....
Little Patriots layout
this layout was made with the funky film papers and GCD's Carnival collection.I also added a journaling block from the Vintage boy collection to house my title.
I love the funky film, it's self adhesive, thin enough to go through my die cut machine and the shiny papers were very inspiring.
I did a subtle 3d design with the funky films by cutting stars out of them and layering the stars on the same color film. When you look at it first you don't notice the raised stars but if you look closer the stars pop out from the background paper.
I thought the rockets red glare ribbons added greatly to the themed page.
I created a visual triangle with the flower tab on the top, the title block and my journaling strips.
Happy Spring tag
This one was made using the Grafix rubon sheet and GCD Sunny days collection pack.
I stamped some flowers onto the rubon sheet and transfered them onto the GCD papers. I have to be honest that the rubon sheet was hard for me to work with. I felt like the ink on my stamps were smearing onto the sheet onces sandwhiched between the rubon and adhesive sheet. But after seeing all the other DT's use of the rubon sheets I can conclude that it's just me that's having a hard time with it. I think I need to read the instructions better. LOL.
I layered the flower circles over each other with pop up adhesive and stamped a simple sentiment on the bottom
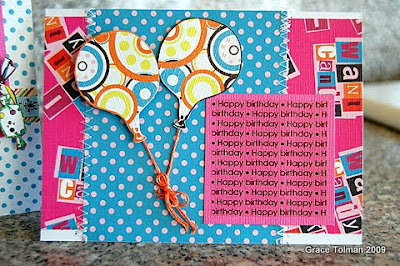
Happy Birthday card set
I used the Grafix transparency sheet and made a simple Happy birthday sentiment in my word document. I made it that it will fill about 2/3 of my sheet. I let it dried first and then used my Party it up collection to make three birthday cards. Each card has a variation on how the transparency was used.
To get the h and b, I ran the transparency through the cricut and it cut well.
I also cut out some fun accesories like the candy and balloon from the paper collection.
So there you have it. Make sure you check at the GCD Studios blog tomorrow (Friday) cause we are giving away $100 worth of products. Yes it's $100!!! That's something that can't be missed!
Thank you for looking and till next time,
Grace
Wednesday, September 23, 2009
Car problem + September Craizy daisy mini
Doesn't it seem like when you have plans that's when things go wrong and then your planned days just turn into one big jumble of blur? Well I started one of "those" days yesterday when my expedition decided to stop on me. I was picking up Marcus from school and when we got in the car to go home, I turned on the engine, the car shook a little (which I thought was fairly odd) then didn't start. At first I thought it was just that the battery needed to be jump started as this has happened to me before but after finding a good Samaritan to help me out, it still didn't turn on.
This is a problem, not just because we're loosing one car and the expenses to fix it is not a welcome idea but also because we were planning a camping trip this weekend. We took it to the auto shop and the guy said he won't have any answers for us till Thursday. Wow that's cutting it really close cause we were planning on leaving first thing Friday morning. I asked Mitch what would be our plan B and he said we'll figure something out tonight! Talk about a big shift in my scheduled week!
Inspite of this, I am counting my blessings....Thank goodness for being a triple A member. With one call I got my car towed and brought to the auto shop; My dady's around that he can give Mitch a ride from the auto shop to the house. Since our other car (Ford Ranchero) only sits three people, I can't give him a ride back with two kids in tow, so my dad came to the rescue; and thank goodness for two cars and a motorcycle. Despite one car at the auto shop, I can still manage to go to work or take the kids' to school wihtout having to ask rides from anybody plus Mitch has his bike so he can still go to work without major shifts with our schedules. We are truly blessed!
Anyways......enough of that!
I made a mini with my Craizy daisy kit and I've been meaning to add pictures to this but Mom and Dad are not available for some picture taking. So just enjoy the book minus the pictures. You can even imagine there's pictures in there if that helps visualize the book. LOL.
Their Story minibook
My purpose for this book was to get some of my parents stories documented. I divided the book (which the tabs helped me greatly) into four sections- Dad's Childhood, Mom's childhood, Their love story and reflections. I got the questions from an idea book filled with journaling prompts. I printed them off on white cardstock and had my parents handwrite their answers. I used the envelopes and pockets to house these cards.
I tried to use all of my kit products for this page. Even the ones that I was going to just throw away like papers that I've punched circles from or itty bitty strips.
I also used my chipboard paislees in a different way by using them as masks. I loved the look of them.
Some paislees where used to make a heart. I thought that was another cute way of using them.
Now that this book is all done, all I need are my parents pictures so my family can better appreciate the project.
If you haven't checked out the September kit, be sure to click here.
Thank you for looking and till next time,
Grace
Monday, September 21, 2009
GCD Studios + Graffix project
Hi all and happy Monday!
You are most probably here because you've heard about the great team up that Graffix and GCD Studios are doing. Well, let me tell you, from a designer standpoint it was a match "made in heaven"! I loved being a part of this duo and being able to combine the two very different products together to make something fun!
So for my share today, I will show this....
You Blew Me Away gift set
This set used Graffix's funky film and GCD's Carnival ride collection.
I wanted to make pinwheels out of the funky film. They exude fun to me and what better way to show that off than some pinwheels?
The set included a card, pinwheel pot and a small gift bag.
I adhered some funky film onto pattern paper having the solid background showing and then cut it out to make the pinwheels. I also used the same sentiment font on all three projects but in different sizes to create balance and consistency on all three items.
the small bag was cut out from the Cricut. I added stitching below the pinwheels to create the illusion of movement.
I also added some felt trim for all three projects for added texture.
Oh and I chose some straws to hold my pinwheels cause I liked the idea of how easy I can bend those straws to where I want the pinwheels to go.
So there you have it. Make sure you check out the rest of the DT shares today and for the next few days. I know I'd be checking them out for some great inspirations.
Thank you for stopping by!
Till next time,
Grace
Sunday, September 20, 2009
some stuff....
hello Sunday.
I love today cause it means....
-a new week is upon us
-a big primary activity that I've been planning is finally executed and over with. Whew!
-I was able to finish some personal projects that I've been waiting to do for a while now. More on this on a later post.
-I got my needed refill of spiritual inspiration and upliftment at church today
and
-I get to blog about something!!!
so onto my "stuff" for today....
WORDS
I just finished reading this book and loved this quote.....
"Remember, everything you have to do means you belong to someone or something. One of the greatest surprises and greatest joys come as you realize that those "have-to's" in your life actually got you where you wanted to be all along!"
I'm definitely feeling very optimistic lately, even though physically I'm tired, because of such a sweet reminder of how special and noble my role is, here on earth.
PROJECT SHARE
I got this card done a couple of days ago with the CPS sketch # 113 in mind but never got around to uploading and sharing it. So here it is. It's better late than never, right?!
I added fabric to this mix. It was a fun thing to incorporate but next time, I'll adhere it first before running it through my sewing machine so it's not moving.
EYE CANDY
I want, want, want, want, want, want THESE!!!!
The wonderful Amy from ModPodgeRocks shared this picture with me today. Most of you know that I'm a self proclaimed "altered gal". I love altering everything and anything and Mod Podge is always my adhesive of choice. Oh how I wish I could get me a set of this!
Oh and if you're eyeing it too, Amy is giving five of this set in her first giveaway at the blog. Check the details here.
Be sure to check back again tomorrow, I have a great project to share. *wink*
Till next time,
Grace
Friday, September 18, 2009
SAHM for 3 days
I was very lucky to have been a "full time stay at home mom" this past 3 days. I say this because as most of you know, I work as a retail associate at nights but somehow they didn't schedule me Tuesday and Thursday so instead of just getting my regular Wednesday night off, I was able to get three in a row! How freaking cool is that!
Ok, ok, ok. You're probably thinking, what's the big deal? Well for this mama that's been missing out on all the night routines, this was a big blessing.
So how did I spend those nights you ask? Well here's some rundown plus all the other happenings around here....
Tuesday- Today was Maddie's first day at preschool. This year would be our last year for Mommy and Me preschool. I'm a little on a fence about this cause I'm excited about the prospect of both kids going to school next year but at the same time a little sad cause Mommy and me preschool has played a major role in the kids' early years that it's kinda hard to know that that phase is almost over.
Here's some pics of Maddie before we headed out to class.
Now that I look at this photo, I should've photoshopped her "ouchie" in the middle of her eyebrows, but then again that's part of the reality that my child is no angel and can't keep herself from playing too hard. Hehehehehehehe.
Her "essentials" for back to school. A new lunch bag, which would never be used this year, but since brother got one, she had to get one too.
and Dora tennis shoes. She was happy to finally wear some comfortable shoes. Her feet has grown over the last 6 months that I held off on buying shoes in the summer so the poor thing had to suffer with toes going over her sandals.
That night I read books to the kids. Dang have I missed this routine! I've missed how the kids can be soooo silent and attentive while I read them a story plus it gives me much pride to hear Marcus read a short book and Maddie recite her abc's and the phonic sounds to them. Aaahhh the little moments that can pass us by if we don't pay attention!
After that, I worked out with Mitch and tried the famous "p90x". That's all Mitch has been talking and thinking about lately and he wanted me to join in. The maker of the system did suggest that you do this system with a partner cause there's more success to it. Being the supportive wife that I am decided to go for it. I'm not sure how much I'd be able to really get out of this since I won't be consistent. After all, next week would be a different schedule at work so I don't know how many nights I can stay home and do this with him. He wanted me to do it during the day but frankly I don't have one hour to spare with all the rest of the things that I have to do.
Then on Wednesday night, after working out and dinner, we took the kids to the cheap theater and watched this....
we've been waiting, "patiently" I might add, for this one to come to the cheap theater. We, especially Marcus, loved the first one so we had to watch this. But since it's pretty pricey to bring the entire family to watch it when it came out, we had to wait. The movie was good. The only disappointing this about this one was that there was things and additions that were not needed that made it hard for us not to cringe and feel bad that our kids were watching this movie. The first one was way cleaner and I believe that if they would've just stuck with the main story and the great graphics, this movie would still be a great one. I hate it when movie people thinks that they have to add bad language and sexual instigations for a flick to sell. How come it's so hard to find plain good "clean" old entertainment now adays?!
Even though that part was disappointing, the whole experience was great. We went to a new cheap theater over in La Mirada. We paid $8 for all four of us. We brought our own popcorn and water and the theater was much cleaner than the one we used to go to in Norwalk. My fave part of this all is how much we saved! Imagine, if you go to a regular movie theater at night, you can easily pay $10 for ONE person. But in the cheap theater, we were able to take all of our family (4) and still paid $2 less than one person's admission in the regular theater. How cool is that?! Waiting for 3 months to watch a movie is not a big deal for us, so this activity will definitely be repeated again!
Then yesterday (Thursday) Mitch celebrated another birthday! Grandma and Grandpa Tolman took our family to dinner at Mitch's favorite restaurant- Don Jose's and then we went home for cake. Mitch requested BTS cake so that's what I made and then for entertainment, Maddie decided that she'd put on a show for us! I'm telling you this girl is like a walking TV. She got it all- the dancing, singing, jokes and a lot of DRAMA!!!
Here's some pics....
Mitch and his parents
The kids and Mitch with his gift and balloon that we gave him.
our yummy cake..
our entertainer of the night...
ok so I gotta go now, this mommy cinderella has work again tonight and that means hurry, hurry hurry!!!
Till next time,
Grace
Ok, ok, ok. You're probably thinking, what's the big deal? Well for this mama that's been missing out on all the night routines, this was a big blessing.
So how did I spend those nights you ask? Well here's some rundown plus all the other happenings around here....
Tuesday- Today was Maddie's first day at preschool. This year would be our last year for Mommy and Me preschool. I'm a little on a fence about this cause I'm excited about the prospect of both kids going to school next year but at the same time a little sad cause Mommy and me preschool has played a major role in the kids' early years that it's kinda hard to know that that phase is almost over.
Here's some pics of Maddie before we headed out to class.
Now that I look at this photo, I should've photoshopped her "ouchie" in the middle of her eyebrows, but then again that's part of the reality that my child is no angel and can't keep herself from playing too hard. Hehehehehehehe.
Her "essentials" for back to school. A new lunch bag, which would never be used this year, but since brother got one, she had to get one too.
and Dora tennis shoes. She was happy to finally wear some comfortable shoes. Her feet has grown over the last 6 months that I held off on buying shoes in the summer so the poor thing had to suffer with toes going over her sandals.
That night I read books to the kids. Dang have I missed this routine! I've missed how the kids can be soooo silent and attentive while I read them a story plus it gives me much pride to hear Marcus read a short book and Maddie recite her abc's and the phonic sounds to them. Aaahhh the little moments that can pass us by if we don't pay attention!
After that, I worked out with Mitch and tried the famous "p90x". That's all Mitch has been talking and thinking about lately and he wanted me to join in. The maker of the system did suggest that you do this system with a partner cause there's more success to it. Being the supportive wife that I am decided to go for it. I'm not sure how much I'd be able to really get out of this since I won't be consistent. After all, next week would be a different schedule at work so I don't know how many nights I can stay home and do this with him. He wanted me to do it during the day but frankly I don't have one hour to spare with all the rest of the things that I have to do.
Then on Wednesday night, after working out and dinner, we took the kids to the cheap theater and watched this....
we've been waiting, "patiently" I might add, for this one to come to the cheap theater. We, especially Marcus, loved the first one so we had to watch this. But since it's pretty pricey to bring the entire family to watch it when it came out, we had to wait. The movie was good. The only disappointing this about this one was that there was things and additions that were not needed that made it hard for us not to cringe and feel bad that our kids were watching this movie. The first one was way cleaner and I believe that if they would've just stuck with the main story and the great graphics, this movie would still be a great one. I hate it when movie people thinks that they have to add bad language and sexual instigations for a flick to sell. How come it's so hard to find plain good "clean" old entertainment now adays?!
Even though that part was disappointing, the whole experience was great. We went to a new cheap theater over in La Mirada. We paid $8 for all four of us. We brought our own popcorn and water and the theater was much cleaner than the one we used to go to in Norwalk. My fave part of this all is how much we saved! Imagine, if you go to a regular movie theater at night, you can easily pay $10 for ONE person. But in the cheap theater, we were able to take all of our family (4) and still paid $2 less than one person's admission in the regular theater. How cool is that?! Waiting for 3 months to watch a movie is not a big deal for us, so this activity will definitely be repeated again!
Then yesterday (Thursday) Mitch celebrated another birthday! Grandma and Grandpa Tolman took our family to dinner at Mitch's favorite restaurant- Don Jose's and then we went home for cake. Mitch requested BTS cake so that's what I made and then for entertainment, Maddie decided that she'd put on a show for us! I'm telling you this girl is like a walking TV. She got it all- the dancing, singing, jokes and a lot of DRAMA!!!
Here's some pics....
Mitch and his parents
The kids and Mitch with his gift and balloon that we gave him.
our yummy cake..
our entertainer of the night...
ok so I gotta go now, this mommy cinderella has work again tonight and that means hurry, hurry hurry!!!
Till next time,
Grace
Wednesday, September 16, 2009
Picture holder plus a how to...
If you have a child in public school in California, then you might have gotten a letter from the school that's asking you to put together a small earthquake kit for your child. I got such a letter in the "parent" packet on the first day of school.
The school asked that we put a non perishable juice box and some granola bars or crackers in a ziploc bag along with the name of the child, his/her classroom number and teacher's name.
One note that I found interesting there was that they added that if we want to add a picture of the family as well so incase, and I mean just incase, there is an earthquake, the picture will hopefully bring some comfort and peace to the child.
Now this little note struck an idea for me. A picture of my family is a no brainer but what if I used some of my scrapbook supplies and make up a "holder" for this special photo. Hence this....
this is a very easy project and decided to share how I made it. Just incase you wanna follow my lead and provide something creative to hold those special photos. This is not only for an earthquake kit of course. LOL. You can use this to carry a special photo in your purse/bag, give it as a gift to grandparents (oh how they love these kinds of gifts) and also now that holiday season is fast approaching, you can turn this little project into a gift card holder. Ahh the possibilitites of a few papers and adhesive.
So how to make it....
first gather your supplies.
You'll need two coordinating papers, some chipboard squares, adhesive of your choice and your pictures. Now you can even go through your scrap stash for this. Just pick one that's big enough to cover your chipboards, maybe no smaller than an 8x8 size.
second, cut your chipboard base to size.
The picture is 3x4 and so I gave about 1/2 inch allowance around it and the chipboard comes out to 4x5 when cut.
third- cover the chipboard.
lay the chipboard onto the back side of your pattern paper. Leave about 1/8" of room in between the board. This will ensure a nice fold in the middle.
fourth- adhere and cut the corners.
fifth- fold and adhere the edges.
using a bone folder or popsicle stick for this process makes for a cleaner and crisp edges.
test the fold.
if it's all good then move to step 6.
6th- cover the inside of the holder. Measure the inside, making sure you'll cover all the parts of the chipboard.
use a bone folder to emphasize the fold in the middle.
7th- place your picture inside. I used some photo corners to it before adhering it inside.
8th- grab some journaling blocks or maybe use your die cut machine to create a spot to write your sentiments or title block.
9th- handwrite for a more personal effect.
and viola! a finished project done in merely 10 minutes.
So I gathered the food and placed them in a ziploc bag like instructed.
and then slip another smaller ziploc bag (incase the juice bursts, I don't want my cute holder and picture to get all wet) for my picture holder.
Now I know I won't get this back at the end of the year but it's alright. There's nothing here that I would miss, I just hope that my son would never have to use it!
Till next time,
Grace
Subscribe to:
Posts (Atom)