Everyone has a story to tell, here's mine sprinkled with some creative projects along the way. Thank you for stopping by and I hope you come back again.
Showing posts with label Christmas ideas. Show all posts
Showing posts with label Christmas ideas. Show all posts
Happy Monday friends. Today I'm sharing my finished December 2015 memories album. I am also going to share with you some of the things that I've learned along the way.
I actually put together a few videos regarding this album. If you wanna watch it, just click play on the following video....
To see what I had put in my Dec. Daily album kit...
What my album looked like at the end of December...
A visual share of my album after it was all done...
If you didn't watch the last one and want to know the lessons I've learned along the way, they are the following...
1. Don't add the word "daily" to my album. Because I didn't add any wiggle room for possible failure in the daily photo taking part of this project, I set myself up for failure because I had the word "daily" in my album title. I don't want to do that again next time, in case I am not successful in capturing every single day of my month.
2. Write the journaling part of the pages on a scrap paper. After I have finished all of my pages, I sat down and just started jotting down my feelings/memories about each day/page. This helped me iron out my words and eliminate any typos or mistakes on my journaling. Plus it helped make the typing or writing part of the journaling fast, because my words were already there.
3. After finishing the book, instead of separating all of the items back into their regular places (ie papers in paper stacks, stickers in their respective containers, etc) I combined them all in one bag and labeled it Christmas products. This way, they were all together and every time I need to make a project that has this holiday theme, everything is in one bag/spot.
Additional lessons...
1. Don't stress if you don't get it done in the month of December. I feel that there are far more important things to worry about than getting an album done by December 31st. It has helped me be "present" during this special time of the year.
2. Fill in the pages of your album with memorabilia like wishlist. Just create a pocket or envelope to hold the ephemera.
Here are some more close ups of my album and the inside...
Thank you so much for stopping by. I hope this share gave you some ideas for your next mini album project.
Hello there friends. Today I’d like to share a super easy card design
that can be mass produced for your holiday greetings. It’s also a great way to
use up ribbon scraps.
Instructions:
Gather your supplies. I will show you on a different blog post where
all my ribbon scraps came from but for now, you can see all sorts of widths and
lengths of ribbon in the mix. This design is also very useful to use up tools
such as embossing folder, die and glitter glue.
Create your card base from whatever cardstock you prefer. I made mine
from white cardstock to measure 4 ¼ x 5 ½”. I then cut a 4 x 5 ¼” piece of
white cardstock and ran them through my Cuttlebug using the Swiss dot embossing
folder.
Next, I used a gold shimmer cardstock to cut my Christmas tree die
from. I ran it through my die cut machine twice to make that all of the detail
cuts were made.
After that, I assembled the card. I picked out a pattern paper with red
and green strips on it as a border and laid out how I want my ribbon scraps to
go under the pattern paper strip. I then cut notches on each one and adhered to
a ¾” strip of pattern paper.
I first adhered my embossed background onto the card then my red strip
with ribbon scraps under it; Followed by the die cut Christmas tree. To add
some more texture, I filled the star top of the die with glitter glue.
Here
are some more close ups of the cards….
I hope this inspired you to add some ribbon scraps to your next
project. Thank you for stopping by.
-Grace
Supplies Used:
Dazzle ribbon, Ivory, 7/8”, Ribbons Unlimited Inc.
Country check, Royal, 5/8”, Ribbons Unlimited Inc.
Edinburgh, Dress Stewart, 1”, Ribbons Unlimited Inc.
Hello friends. Today I'm honored to be the designer spotlighted at Inspired By Stamping. Christmas season is upon us. What traditions do you share with your family?
I love creating traditions with my little family. It's exciting to celebrate seasons like this in a fresh pair of eyes, especially of my children. This year I wanted to take the advent calendar in a different direction. Usually advent calendars have little trinkets or treats to countdown to Christmas. Well I'm trying to teach my children to think less about the 'stuff' and more about the true meaning of the season. I was so happy to have found this scripture countdown online and I thought that I'd do this as the way to count down to Christmas. To get this calendar done, I used some cut files from Inspired By Stamping, as well as a stamp for the numbers. Here's the result...
I used the Sugar and Spice cut file (gingerbread man and the bow tie) cut from brown paper and red and white pattern paper. I love how cut files makes mass producing shapes so easy. I was able to cut the shapes in less than 10 minutes. I added a face to each one with just a marker.
For the numbers- I stamped this postage stamp on white cardstock. Since the stamp is not a Christmas one, I covered the center with pattern paper. I then used a bunch of Thickers for the numbers. I kept the colors the same so there's cohesiveness even though I used different types of fonts and textures.
To tie them all together, I punched out holes on the sides and alternated the red and gold ribbon.
I didn't know how to add the scriptures on the individual gingerbread man cuts but couldn't think of any way to do it creatively so I ended up just taping it on the back.
So there you have it. I'm so excited about how this will help our family remember the true meaning of the season.
Hi there friends. I know that in some parts of the world, Christmas starts before Halloween, but I prefer to get into the spirit of the holiday season AFTER Thankgiving. Isn't that how it used to be? Anyways since I'm in the holiday mood now,I decided to share with you my Christmas card for this year...
I haven't massed produced Holiday cards in a while and decided that this year, I will go back to my "roots" so to speak. I loved making handmade cards for the holiday season and it gives me a great excuse to use up my stash.
I created this card using this a few stamp sets from Inspired By Stamping. They can be found here, here and here.
While creating my card, I found some easy ways to make this project cost effective and efficient. Want to hear it? Watch the video below to learn more.
And here's a few more close ups of the card...
Now all it needs is a family photo and I might even type up a year in review newsletter. I'm on a roll here!
How about you, do you make handmade cards for the season? What's the best tip you've found that makes it fun for you?
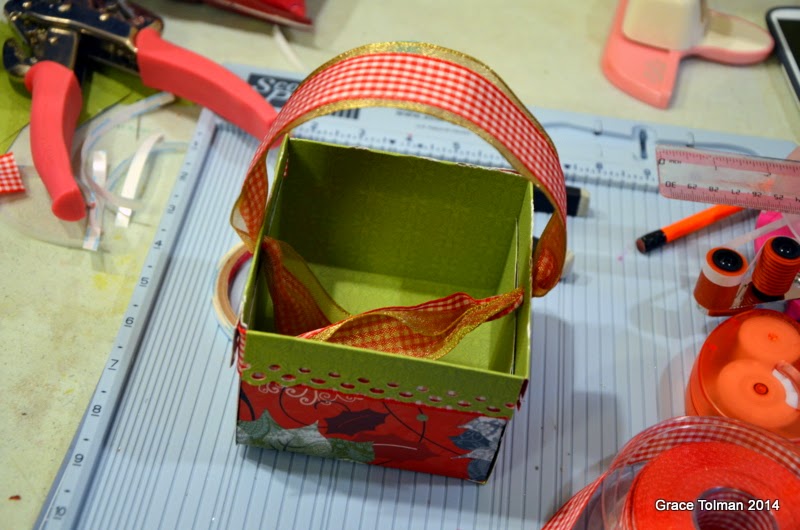
Hi there Ribbons Unlimited friends. Today I’d like to share a project
that can easily be mass produced and could hold your favorite Holiday handmade
gift or like me, just fill it up with candy and you are good to go.
Instructions:
1. Using a full 12x12 sheet of paper, Score at 1”, 4”, 8” and 11”. Turn
the paper 90 degrees and repeat the scoring process. Fold on the scored marks.
2. Cut at the 4” and 8” marks leaving a 4” square box in the center. If
you desire, you can cut away 2x4” on each corner of the template. I did this
for the first one to trim down the excess paper and the layers of paper won’t
be too bulky but I found that it lost some important structure so I opted not
to trim the corners on the second box.
Punch out a border on each edge of the box. Grabbing the two 2x4”
pieces towards the center, adhere them together and then adhere one side of the
box over them. Fold the edge over the front.
3. To reinforce the structure of the first box, I adhered a strip of
the red checkered ribbon around the box.
4. Adhere the ends over each other using some glue dots.
5. Punch out a hole on two adjacent sides of the box. Adhere the
checkered ribbon over the gold trim.
6. Thread
both ribbons through your holes, and adhere the ends inside the box using some
tape.
7. Create two bows from the gold ribbon and adhere on the sides of the
box, covering the holes you’ve created for the handle.
8. Add a sentiment block using paper and stickers. Repeat the process
for how many boxes you need to make.
Here’s some more close ups…
Thank you for joining me today and I hope this helped you find ways to
incorporate your ribbons and papercrafting supplies in your gift giving this
season.