Everyone has a story to tell, here's mine sprinkled with some creative projects along the way.
Thank you for stopping by and I hope you come back again.


Showing posts with label 2017. Show all posts

Monday, August 27, 2018

“Dream Big Little Mermaid” card and matching envelope (Whimsy Stamps AND Glue Dots blog hop)


Hello friends and Happy Monday. I hope you all had a great weekend and that creating was part of that. Today I'm joining in on the Glue Dots and Whimsy Stamps blog hop. As part of the Glue Dots design team, I got the privilege of working with the Whimsy stamps for the first time and I have to say that I'm now a fan. I love the design of the stamps and the cool dies that was sent to me. 

Whimsy Stamps and Glue Dots Inspirations HopJoin us from August 27h through August 31st for a fun joint blog hop between Whimsy Stamps and Glue Dots. Our teams will be sharing lots of beautiful projects featuring products from both of these companies. And we will have lots of prizes hidden along the hop as well as a grand prize valued at $100! To enter into the giveaways, you just need to comment on EACH blog throughout the hop. Then for the grand prize after you have commented on all stops along the hop, enter your name and email in the linky tool at the last stop. Winners will be randomly selected and announced on Monday, September 3rd. Good luck and have fun!

Here's a card and envelope that I created for the blog hop.....


“Dream Big Little Mermaid” card and matching envelope
Designed by: Grace Tolman
Time: Approximately 1 hour
Level: Intermediate
Size:  A2 card size (4 ¼ x 5 ½), Envelope (4 1/3 x 5 ¾)


Notes:  When I saw the mermaid image on the “Let’s Be Mermaids” stamp set, I knew I had to do an underwater card. It just called for it. And with some ink blending technique and marker coloring, I was able to add various layers of coloring to this card using only white cardstock.

Materials
White Cardstock- Earth Tone Cardstock Pack, The Paper Studio
Stamp set- Let’s be Mermaids, CWSD 227, Clearly Whimsy Stamps
Markers- Bold set (1122 BL-6N) and Natural set (1122 BL-6M), Brush lettering, Marvy Uchida
Envelope- Source unknown


Tools:
Ultra Thin, Glue Dots®
Pop Up, Glue Dots®
Removable glue tape, Glue Dots®
Mini dot, Glue Dots®
Ink- Black, Hybrid, My Favorite Things; Embossing,  VersaMark, Tsukineko; Pewter, Mix’d Media, ColorBox; (Mermaid Lagoon, Blueprint Sketch, Tumbled Glass, Fossilized Amber, Shabby Shutters, Crushed Olive) Distressed Mini Ink cubes, Ranger
Ink Blending tool- Ranger
Stamp Positioning Tool- Tonic Studios
Glimmer mist- Maya Mist, Maya Road
Embossing Powder- Gold, Hampton Arts
Glitter pen- Shimmer pen, Nuvo, Tonic Studios
Die cuts- Card Builder Window Set (WSD 423), Whimsy Stamps; Leaf foliage 1 Die Set (WSD410) Whimsy Stamps
Manual die cut machine- CuttleBug, Provo Craft
1 ¾” punch, EK Success
Paper Trimmer
Scissors

Directions:
1. Cut the 8 ½ x 11 white cardstock piece into two 5 ½ x 8 ½ pieces. Fold one into an A2 card size and set aside.

2. Use the other piece to cut out the frame and the leaf shapes using the respective dies.


3. Using another piece of white scrap cardstock, stamp the mermaid image using the black ink. The stamp positioning tool is best for these kinds of projects so you can get a clear impression by stamping the image 3-4 times without worrying about alignment issues.


4. Color the image with the Marvy Uchida markers. Cut out the image using some scissors. Add some shimmer to the mermaid with the Nuvo shimmer pen. Set aside.


5. Grab the rectangle die cut piece and create a water background. Blend the 3 blue distress ink pads together (Mermaid Lagoon, Blueprint sketch, Tumbled glass) using the blending tool and some sponge pads onto the white paper.


6. Spray some glitter mist using the Maya mist and set aside to dry.


7. Place some Removable Glue Tap, Glue Dots® adhesive onto a white scrap of paper. Temporarily adhere the leaves on it and add color to it using the rest of the distress ink cubes and the blending tool. Spray some more glimmer mist if desired.
8. Heat emboss the sentiment on a white scrap of cardstock using some gold embossing powder. Punch out the shape with a 1 3/4 “punch.


9. Assemble the card- Place the “underwater” panel onto the center of the card using some Ultra Thin, Glue Dots® adhesive.


10. Add the underwater foliage on the bottom of the panel using some Mini Dot, Glue Dots® adhesive.


11. Place the mermaid onto the top left side of the card. Adhere with some Pop-Up, Glue Dots® adhesive.


12. Place the sentiment onto the underwater panel using some more Ultra Thin, Glue Dots® adhesive.
13. Stamp the mermaid image onto the front left edge of the envelope with Versamark ink. Heat emboss with gold powder.

So there you have it. I hope this post inspired you to create today.

Full Hop Link List
Sue 
Grace >>>> You are here

Make sure you check out the rest of the blogs that are participating in this blog hop. There are some fun prizes to be had if you do so. Check out the Glue Dots and the Whimsy Stamps blogs for more details.

Till next time,
Grace

Wednesday, December 20, 2017

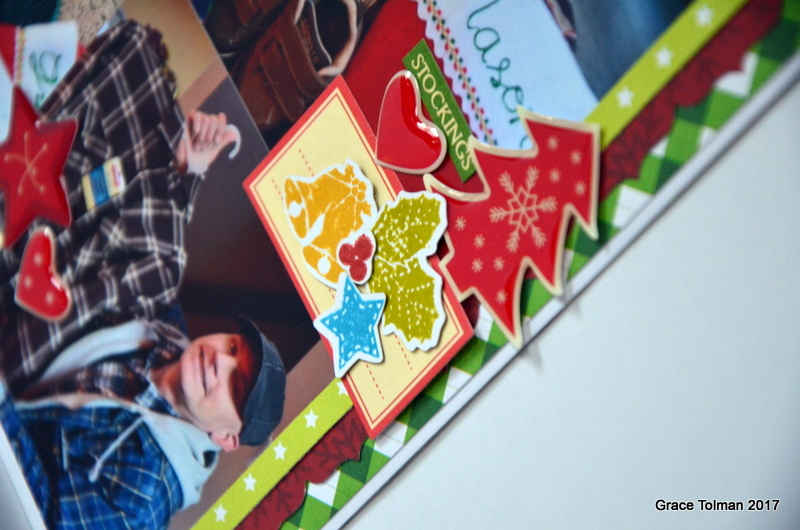
Monthly Celebrations December Edition "Celebrate Christmas Morning"


Hello my dear blog friends. How are you today? Hope you are all well and are enjoying the Holiday season. I am officially on break from school and my list of "fun things to do" is a mile high. Don't know if I will be able to get them all checked off. But it is always nice to know that I can do something else other than school work. :)

Today I am sharing my latest Monthly Celebration page and video. This is a year long collaboration that I've done with my scrappy sister Nicole, ColieBing on YouTube as a way for us to share how we document events in our lives. I have been pushed outside of my comfort zone at times with this project. Especially with creating 12 different double page sketches. Have you seen them all? What did you think of them? 

Anyways, without further ado, here's the December sketch...


and here's my page...


And here's the process video...


Plus of course close ups...


Thank you so much for stopping by.

Make sure you check out ColieBing's YouTube channel to see her take on this month's theme.

Till next time,
Grace


Monday, November 20, 2017

Monthly Celebrations November Edition "Hunting Brothers"


Hello friends. It is that time of the month again where I seem to remember I have a blog and have something to share. Question, how often do you still read blogs? I am trying to think if it is still worth holding on to this platform. If you are ever looking for me, you can also find me on Instagram and You Tube, both links are on the side bar of this blog. 

Ok so Nicole and I are at it again this month. We are sharing another layout that showcases something we celebrate for the month of November. I went with the nontraditional November event and that is a hunting memory. My husband goes hunting with his "mountain man buddies" once a year. They go up in the mountains of Colorado and hunt for Elk. 

As always, my page comes with a sketch...

And here's my page...

Here's the process video that goes with this...

And more close ups...


 I pulled out all of my masculine products for this page, which I have realized is not that much.

Do you find that there is a specific theme that you don't own that many of?

Thanks for stopping by. Make sure to check out Nicole's YT video here.

Till next time,
Grace


Friday, October 20, 2017

Monthly Celebrations October Edition "Happy Halloween 2016"

Hello friends. I know that this blog has been neglected in the last few months and I do apologize about that. If you are ever wanting more inspiration from me, please make sure to subscribe to my YouTube channel and follow me on Instagram as those are the avenues that I am most active on. Their links are on the side bar of this blog. 

Anyways, it is that time of the month again where ColieBing and I share our takes for this month's Monthly Celebration series. I chose to do a Halloween page since that is a yearly event that me and my family celebrate in the month of October. And here is the sketch that I used for this one...

And here's my page...

Here's the process video for this layout...

And here are some more close ups...


 Thank you for stopping by.
Please visit ColieBing's channel to see her video.

Till next time,
Grace


Wednesday, September 20, 2017

Monthly Celebrations *September Edition*


*If you are saw this post before Sunday, September 24th, I apologize for not putting any words in it. I have totally forgotten that I scheduled this post but never got around to putting my words. *

Welcome to this month's Monthly Celebration blog post and video. If you are new to this series that I am doing this year, it is a collaboration with ColieBing in YouTube where we make and share a page about a specific event or topic that we celebrate for that month.

I have been sharing sketches along with my pages and for this month, here is the sketch...

I decided to scrap some school photos since September is usually associated with start of the school year. Although where I live, my kids always start in the middle of August. :)

And here's the process video of this page...


And here are some close ups....


Make sure you stop by ColieBing's YouTube channel by clicking on this link. And now I'm curious, what do you celebrate in September?

Thanks for stopping by. 

Till next time,
Grace

Sunday, August 20, 2017

Monthly Celebrations *August Edition*


Hello friends and welcome to another monthly share of my year long collaboration with ColieBing on YouTube. This year we are sharing a page every month and the theme is monthly celebrations. I try to share a double page layout every month, along with a sketch. This month's sketch is this one....


And here's my take on the sketch....

I wanted to go out of my comfort zone a bit so I did some triangles and angles in this page. Here's my process video for the page...

And here are some more close ups...


As with anything in this blog, if you have any questions about this particular post or layout, please don't hesitate to leave in the comment section below.

Make sure you check out Nicole's page here.

Till next time,
Grace