Everyone has a story to tell, here's mine sprinkled with some creative projects along the way.
Thank you for stopping by and I hope you come back again.


Monday, May 21, 2018

One Sketch, Two Cards *Scrapbook Generation Sketch*

Hello friends. Happy Monday. Today I'm sharing a couple of cards that I created about a week ago. It was based on a Scrapbook Generation sketch that you can find in their FB group. 

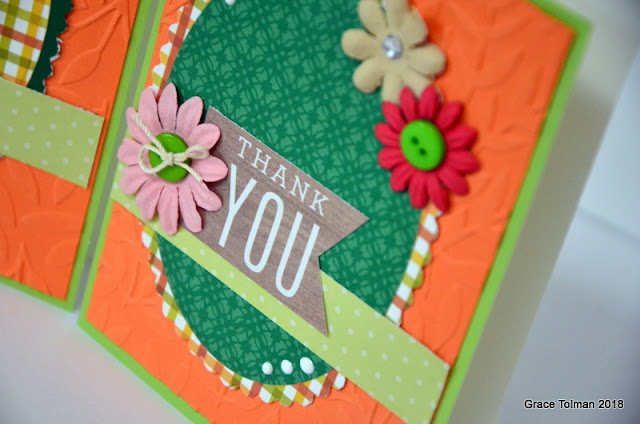
I got an oval nesting die from Consumer Craft as part of my Mother's day gift and wanted to play with it so I used that to cut out my oval frame. In my gift, I also got a leaf embossing folder and used that for the orange cardstock background. Don't you love it when you have new supplies? All you want to do is play with them. 

 I used a bunch of scraps on this card. I also pulled out some flowers, that I seem to never reach out for anymore.

There you have it. Two cards from just one sketch.

Hope this inspired you to create something today.

Till next time,
Grace

Friday, May 18, 2018

Animal themed cards

Thank goodness it's Friday. Do you feel the same way? I can't wait to craft. I have some creative things planned for this weekend and I'm crossing my fingers I will have time to do them. 

But before I tackle my crafty projects, let me share with you a card set that I created last weekend. I wanted to use up more scrap papers (I seem to never run out of those) and made these. 
I have this animal stamp from Mama Elephant that I swear is the best animal stamp set out there. I have used it on multiple cards. Even used it when I was teaching card classes with my friends and a group of young girls in my church. They are just so cute, no one can resist them. 

 I also had some new Spectrum Noir Markers that I wanted to play with (it was my Mother's day gift this year) and tried them out on these animals.

After coloring the animals, I sprayed them with some glimmer mist for some added shine. Then rummaged through my stash and layered multiple papers over each other.

I finished off each card with some rhinestones.

So what do you think? Do you like these kinds of cute animal images?

Till next time,
Grace

Wednesday, May 16, 2018

"Love Time Spent With You" layout *ScrapRoom Freaky Fast Friday challenge*

Happy Wednesday friends. Today I'm sharing a page I created with the latest Freaky Fast Friday challenge over at The ScrapRoom blog


I really like how this challenge helps me see my "scraps" in a whole different light. It also helps me move out of my comfort zone as far as design was a concern because I am already working with a certain group of precut pieces of paper. 

 I also used my homemade scrapbook kit for this page. I had fun using those small stickers from Bella Blvd.

I was inspired to color my wood shape brown to mimic the toast marks on the sandwich in my photo. I then added some Nuvo pink drops onto the edge to give it a bit more design.

There were two small strips of paper in the recipe for this challenge and I cut one end of it into a banner shape.

So that's it. Thank you for stopping by.

What is your favorite thing to do with scraps?

Till next time,
Grace

Friday, May 11, 2018

"15th Anniversary" layout *ScrapRoom JumpStart Sketch Challenge*

Happy Friday friends. Today I'm sharing the first layout I created with my homemade kit. This one was also inspired by the following sketch over at The ScrapRoom blog. 

I turned the sketch to its side since my photos are mostly vertical. I also wanted space to add four photos instead of the two that were shown in the sketch. 

I had these chipboard shapes within my homemade kit and I dressed one up by heat embossing it with some red powder. I backed up the piece with a red dot paper too.

This "you & me" sign was from a 3x3 piece of cut apart paper and I just fussy cut around the image to create my embellishment. I also added it with some foam adhesive to give it some dimension.

This "so happy" piece is part of a 3x4 paper. I used an exacto knife to cut around the design and tucked the bottom of my photo under there. That way I have both my image and the words showing on my page.

That's it for me today. I hope you have a great weekend and advanced Happy Mother's day to all my mommy blog readers out there.

Till next time,
Grace

Wednesday, May 9, 2018

May/June Homemade Scrapbook Kit

Hello friends. How are you all doing today? I wanted to share a quick blog post with a video showcasing the products that I've pulled out of my stash to use for the next couple of months. 


I've been making a homemade scrapbook kit for about a couple of years now and I find that doing this allows me to use up my stash; rotate some items, especially tools that I've neglected to incorporate in my scrapbooking; and give me some fresh combinations that I would have never thought of if I looked at my stash as single items.

I hope that this inspired you to create a homemade scrapbook kit too.

Let me know if you have any other questions.

Till next time,
Grace

Monday, May 7, 2018

“Color Me” Art Card Kit *Glue Dots Project*

Hi guys and Happy Monday. Did you have a crafty or artsy weekend? Well I hope this one can inspire you to create something this week. 

When I thought about the assignment of teacher gift for my latest Glue Dots project, I couldn’t help but think of the many art teachers out there that keeps on inspiring their students. I dedicate this project to them. I love that this project not only helps the teacher bring out his/her talent into a card but he/she can then send that colored card to someone special. Putting all the elements into a DIY kit container makes it even easier to keep everything organized and ready when the itch to color comes. 


“Color Me” Art Card Kit
Designed by: Grace Tolman
Time: Approximately 45 minutes
Level: Intermediate
Size:  8 7/8 x 5 x 1”

Materials
        Cards- Pastels, Box of Cards, Die Cuts With a View
        Pattern papers- Minty Lace, 12x12 Stack, Die Cuts With a view
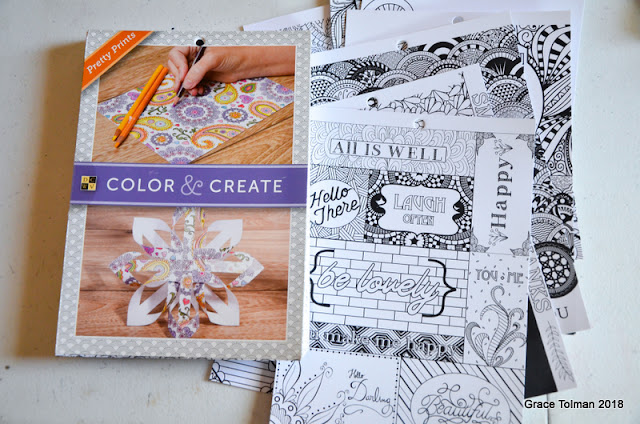
        Coloring Sheets- Pretty Prints, Color & Create, Die Cuts with a View
        Silk Ribbon- Green, Offray
        Cardstock- (Black) Doodlebug Design Inc.; (Beige) WorldWin Papers
Tools:
        Glue Lines, Glue Dots®
        Scor Pal
        Scissors
        Paper Trimmer


 Directions:
1.       Place the beige paper horizontally onto the Scor Pal and score at the 5” and 6” marks. Fold the marks.
2.       Place some Glue Lines, Glue Dots® adhesive on the center edge of the kit container and adhere a piece of ribbon on both sides. These will be the ribbon closure for the kit container.
3.       Adhere the container foundation (beige cardstock) to a piece of pattern paper from the paper stack using some more Glue Lines, Glue Dots® adhesive. Trim the excess paper and reinforce the folds.
4.       Cut a 3” wide pattern paper and adhere to the beige cardstock (inside of the card kit container) towards the bottom. Place Glue Lines, Glue Dots® ONLY on the edges of the beige cardstock, leaving the top open. This will create the pockets to place elements in.
5.       Repeat step 2 for another pocket right above the one just created using a different pattern paper.
6.       Choose the “coloring” pages that you would like to make card fronts and sentiments with. Cut the card fronts to be 3x5” and adhere to the black cardstock using some Permanent Glue Tape, Glue Dots® adhesive. Trim to create a 1/8” mat all around the card front panels.
7.       Repeat the same process with the sentiments you chose to include in the kit.
8.       Add some Ultra thin dots, (Value pack) Glue Dots® adhesive to the back sides of the card front panels and the sentiments. Leave the clear backing of the adhesive intact. This way the Art teacher can take it off when he/she is ready to build the card together.
9.       Stamp the labels for each element group within the card kit. Adhere the labels to the tops of the pockets using more Permanent Glue Tape, Glue Dots® adhesive.
10.   Place the card bases, envelopes, card front panels, and sentiments inside the kit container. Tie the ribbons to close.
11.   Present the gift with a box of colored pencils. 


Thank you for stopping by.

Till next time,
Grace

Friday, May 4, 2018

10 Cards, 1 Homemade kit (May 2018 edition) Process Video #2


Hi there friends. As promised here is the 2nd process video showcasing how I utilized my latest homemade card kit. 


And here is a close up of the cards created in the video...

Card #6


Card #7


Card #8


Card #9


Card #10


And here's another look at all 10 cards created...

I hope that you've enjoyed this card share. I truly enjoyed making these cards and like I said before, these are one of my favorite cards thus far. 

Thank you for stopping by and I hope you have a fantastic weekend. 

till next time,
Grace

Wednesday, May 2, 2018

10 Cards, 1 Homemade kit (May 2018 edition) Process video #1


Hello friends. Today I am going to share the first of two process videos that shows how I used my latest homemade card kit and made 10 different handmade cards. Click on the video below to watch my process...

And here are the close ups of the cards made in the video...

Card #1


Card #2


Card #3


Card #4


Card #5


 And here is a look at all 10 cards.


Make sure to stop by again on Friday to see how I made the other 5 cards.

Till next time,
Grace