Everyone has a story to tell, here's mine sprinkled with some creative projects along the way.
Thank you for stopping by and I hope you come back again.


Showing posts with label GCD Studios. Show all posts

Friday, July 26, 2013

Paper Beach Bag with Sunkissed Collection

I am amazed at the many things we can create with paper. The possibilities are endless. Since it’s the summer month, I decided to push the envelope a little and try to create a beach bag from paper. I’ve sewn bags before so I used that experience to put this project together.  I made a few changes since the paper cannot be turned over after stitching and at the end, I found that nothing is impossible with paper and a dose of the right inspiration.


Instructions:
1. Cut a 3” wide strip from 12x12 paper. Score the two long ends on the ½” marks and fold. Repeat the process on another strip.
2. Sew the strips on two 12x12 sheets of identical papers.  To connect all strips, sew a stitch on the last fold and then adhere the edge to the paper. *Since this is paper and cannot be turned over to its right side so you will create the look of sewn edges without actually sewing the last strip to the bag.
3. Cut another 3” wide strip and score the long ends on the ½” marks. Add adhesive to the folded parts and adhere on the bottom of the bag. Add a die cut border on the front side of the bag.
4. Cut 4 1 ½” strips from 12x12 paper.  Score the one of the strips on the ½” mark, fold and overlap two together. Connect the strips with some machine stitch. Repeat the same process on the other two strips to create handles.
5. Round corners of the handles and place on the top center of the bag. Attach some big buttons on both ends with embroidery floss.
6. Decorate the front of the bag with paper, flowers and stickers.
*This bag is for decorative purposes only. Using it near or in water will damage the bag.


 Here are some close up look at the finished project..


Summer Lovin’ Paper Beach Bag
Size: 12 x 22”
Products Used:
Sunkissed (#2057 Sassy Swimmers; #2061 Pretty Swimsuit;  #2065 Tickled with sunshine; #2033 Label Stickers; #2036 Die cut borders)
Other Supplies:

Flowers, Buttons, Embroidery Floss, Photo Corners, Thread, Sewing machine, Corner Rounder punch, Adhesive

Have a fantastic day,
Grace

Wednesday, June 19, 2013

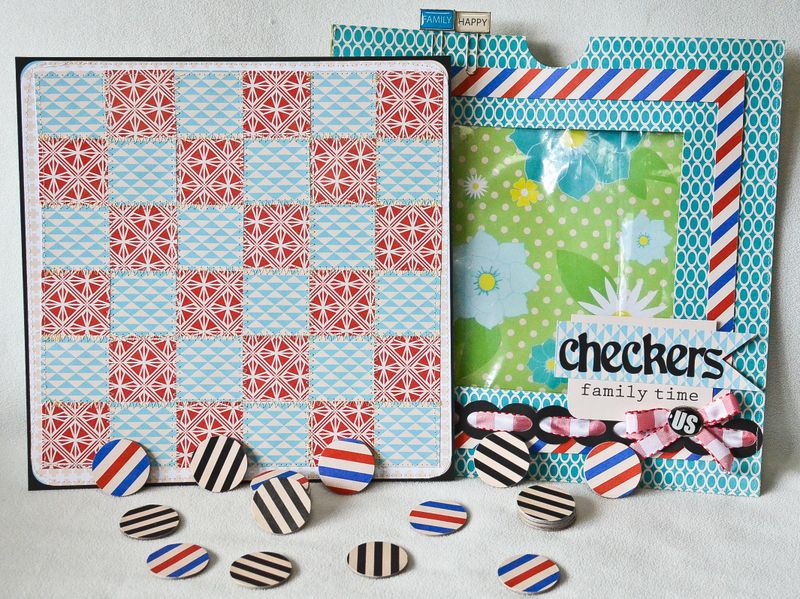
Handmade Checkers Game Set *GCD Studios Special Delivery Collection*

It's Wednesday and that means we are halfway through the week. I'm plugging along, how about you? Well if you have sometime to be crafty today, how about this for an inspiration?

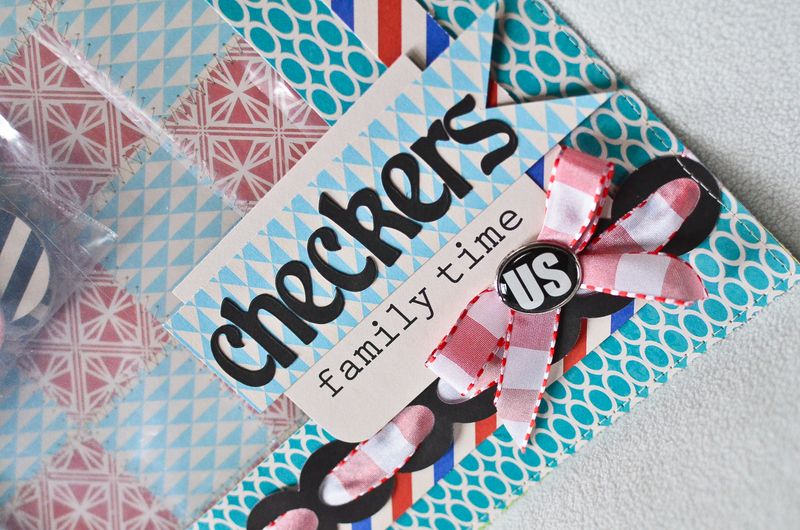
Fourth of July means BBQ, family time and for most of us, picnic gatherings. So today, I’m sharing a handmade checkers game that can easily be transported to your next picnic party. It will provide lots of fun for you and the family. 


Here’s how you can create your very own game board and envelope storage:


1. Choose your papers. I used a combination of subtle and colorful designed sheets. You will also need some chipboard circles for the game pieces, your sewing machine and mod podge.
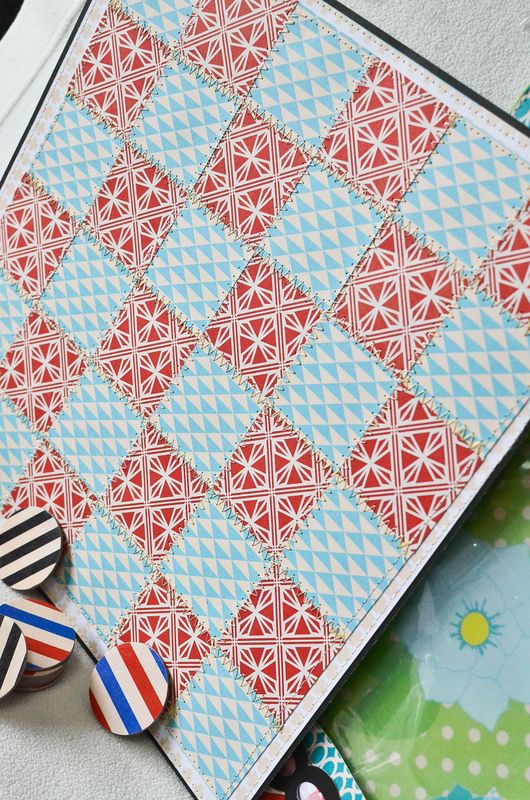
2. Work on the game board first. Cut out 1 ¾” squares from two pattern papers. I was able to fit 36 squares on my paper. Adhere the squares on the board*.
*I only used adhesive in the centers of the squares since I was planning on sewing around the edges of each square.
3. Add some zigzag stitching on the edges of each square. 


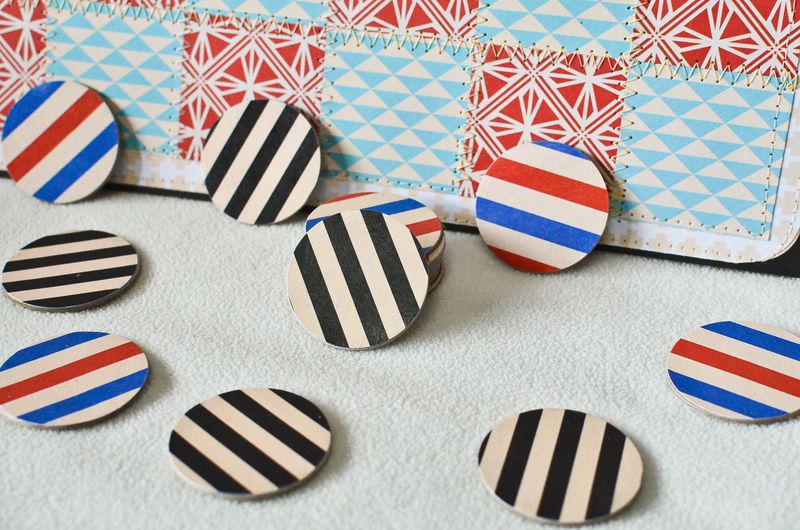
4. Punch out 12 1 ½” circles from two pattern paper. You will need 24 circles in all.
5. Adhere the circle papers on top of the chipboard shapes. Add Mod Podge on top of the papers (over the chipboard) to make sure it won’t peel off the chipboard shapes. Set aside to dry.
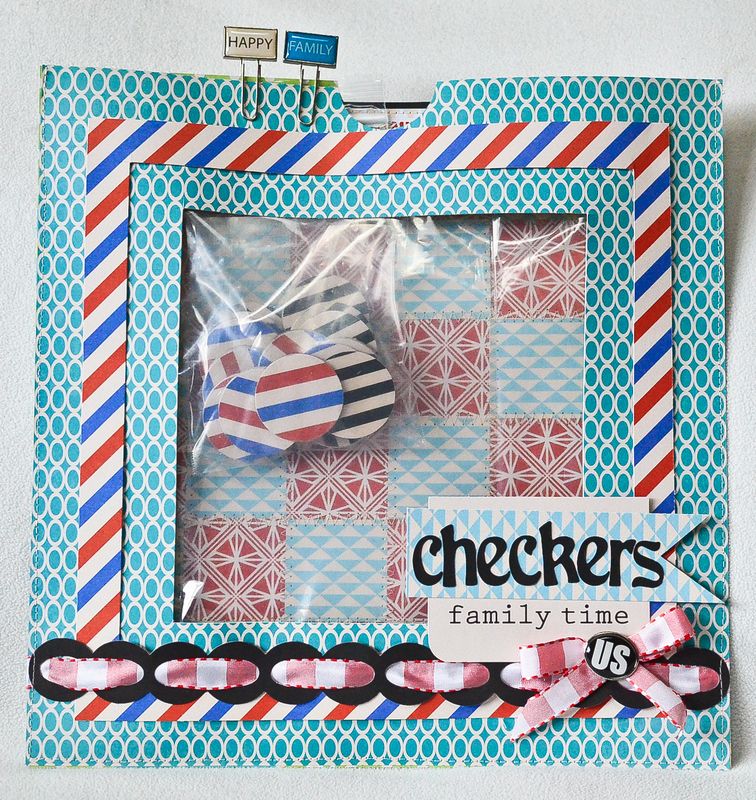
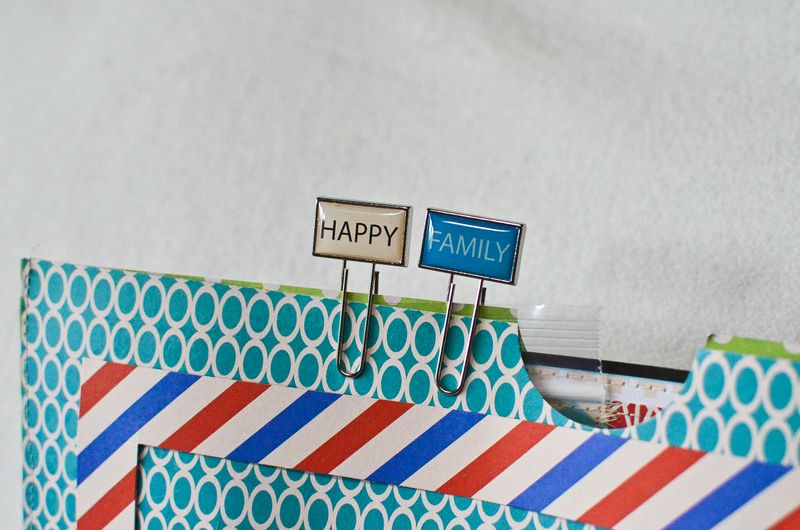
6. Now you need to create the envelope to store the game pieces and board. Pick two papers. Cut out a window in the middle of one of the papers. Mine measured 9 ½” square. Cut a piece of plastic and sew over the cut out window of the paper. Sew the paper with window, to the 12x12 piece leaving the top open. Punch out a circle on the center of the top of the envelope. Embellish the front of the envelope.
7. Create a title for your envelope. I layered some papers and letter stickers from the Special Delivery line.
8. Slip the board inside the envelope. Place the game pieces inside a plastic bag and secure inside the envelope with clips.

and here's some more close ups of the finished project... 


Checkers set
Size:  Envelope storage 12x12; Checkers board- 11x11; Checker circles- 1 1/2”
Products used:
Special Delivery (#2040 Dillon; #2041 Heidi; #2042 Guido; #2043 Jack; #2044 Sincerely Yours; #2045 Bradley’s Travels; #2051 Alpha Stickers; #2052 Label Stickers; #2053 Brads; #2054 Paper Clips; #2055 Die cut borders)
Other supplies: Chipboard circles, Thread, Sewing Machine, Ribbon, Corner Rounder; Circle punch; Adhesives.

Thanks for stopping by.

Till next time,
Grace

Wednesday, June 12, 2013

PaperCut magazine from GCD Studios

Happy Wednesday. PaperCut magazine was officially released last week and our super awesome design team leader Heidi is on the cover. Check it out here.

I created two projects in this magazine. Here they are along with close up photos...

My Little Man
This layout featured papers from the Special Delivery line. I created paper shirts along with ties to match the theme of my photo. 

I love layering stickers on top of each other. 

These shirts were so fun to make. There are a bunch of tutorials online and on Pinterest for these fun accents. 

Beauty Hurts!
I decided to finally document photos of when I had my eye brow threaded during my vacation to Cali two years ago. Sadly I only get these pampering done when I'm. They charge double in Colorado. I guess there's not a lot of competition here so they can rack up their prices. 

More layering of stickers can be found in this layout. This page was also created with the Special delivery line. 

I love that postage stamp with eye glasses image on it. Super nerdy, kinda how I felt after documenting this photo. I can be a dork sometimes. :)

Make sure you flip through the pages of the latest PaperCut magazine issue. There are TONS of inspirations to be had. I definitely feel honored to be a part of a very talented team. 

Till next time,
Grace

Thursday, May 23, 2013

Dream a little dream layout *GCD Studios Pure Bliss Collection*

 Hi there friends. Our children takes up the majority of our scrapbook pages. And sometimes it gets a little redundant. I mean, they have yearly birthdays, first day of school, holiday events and everything in between. That’s why with this layout I decided to write a special letter to my daughter to change out things a little bit. This page was actually inspired by the title that I had cut out from a pattern paper in the Pure Bliss collection then I wrote 10 reasons why I wanted my little sweetie to never stop dreaming.


I wanted to make this “letter” to my daughter very personal so I handwritten my journaling.


I dressed up my title circle with epoxy dots and adhered it with foam adhesive to add dimension to it.


Little bits of fun stickers and pins finished off my page. 

Products used: Pure Bliss (#2018 Happy Hoops; #2019 Alphabet; #2024 Dainty Floral; #2025 Journal tags;  #2035 Paper Clips; #2036 Die cut borders; #2033 Label Stickers; #2034 Brads); Happiness (#1868, Glitter Epoxy Dots)

Other supplies: Cardstock, twine, flowers, pen, letter stickers  

Thanks for stopping by.

Till next time,
Grace

Monday, May 13, 2013

Winner of GCD Studios blog hop + some links

Happy Monday friends. I hope all of my Mommy friends and blog readers had a fantastic day yesterday. I'll talk about my own Mother's day experience later on this year. But today we are going to do some crafty sharing...

I was so honored to be a part of a great hop last week and as promised, I'm announcing the winner today. Due to the great amount of comments, I used random generator to help me pick the lucky winner.

The winner is...
Blogger kate blue said...
Love the card cause the colors pop....so much to love about these collections but I gotta say I LOVE the Spencer paper !
Congratulations!!! Please email me at graceelainetolmanATyahooDOTcom and I'll get your price shipped. :)

Thank you Teacher frame

I was contacted by Glue Dots some months go inviting me to create some projects for them. One of the things I made was this teacher frame. I love how the adhesive projects Glue Dots offers allowed me to add textures and elements, like the crayons, in the frame. Check out the blog post here which includes a super easy directions so you can recreate it yourself. 

and finally, here's a link to MY LATEST VIDEO. Blogger is being a pain today and not allowing me to share the video right here on my blog. Up to this day, I will still have those days when technology and I are not n'sync with each other. But here's the look of the finished page. 

Balanced Rock layout


Thank you for stopping by.

till next time,
Grace

Monday, May 6, 2013

Heidi Sonboul signature Series Blog Hop

 photo HeidiSonboulSignatureSeries.jpg
Hi friends and happy Monday. This is an exciting day for a dear friend of mine and I'm so happy to be a part  of this hop. If you have not already checked out Heidi Sonboul's book from Northridge Media, come and check it out here. And to "kick off" the release of her book along with a brand spankin' new site the whole GCD Studios design team along with some other talented ladies had teamed up for this special "party". You will find the complete of hoppers list just after my project share.

Wish you were here card
Heidi designed two paper collections for GCD Studios recently and one of them is called Sun Kissed. It's one of my favorite lines for Spring and Summer. In this card I layered some papers and a die cut border. I even cut out my sentiment from one of the paper strips. It truly is a very neat collection that has many uses.


Now here's the complete list of the blogs you can hop with today...


Christina Collins
Christine Meyer
Grace Tolman---- you are here
Heidi Van Laar 
Jennifer Chapin
Julie Tucker-Wolek
Katrina Hunt
Kelly Holbrook
Lalo IK
Megan Klauer
Nina Yang
Pam Callaghan
Rae Barthel
Rochelle Spears
Sara Zenger
Suzanna Lee
Teri Anderson
Wida Miller


and of course the party wouldn't be complete without a giveaway. A lucky person who comments will receive these products from me...


To enter, simple tell me what's your favorite thing from Heidi's Sun Kissed and Special Delivery lines. This giveaway will be open till May 10th (12 midnight, Mountain time) and I will announce the winner next Monday. 

and there's another chance to win some fun products...

Head over to Heidi Sonboul's new site for a chance to win the newest tool from Fiskars and her two newest collections, Special Delivery and SunKissed.
 photo SignatureSeriesBookcover1.jpg
To order the book you can go here:
 photo buyitnow.jpg

thanks for stopping by and have fun hoppin'.

Till next time,
Grace

Thursday, May 2, 2013

Live Laugh Love Wall decor *GCD Studios Nostalgia Collection*

Hi friends, Grace here to share with you a new way to incorporate some non-scrappy items into your papercrafting projects.
Cupcakes are a big rage right now. They come in regular, mini and even extra-large ones. All sorts of flavors from the typical chocolate or vanilla to something exotic like Cayman Spice and Peanut Butter banana.
But even more fun are the cupcake liners that are available to us now. There are all sorts of colors and patterns to choose from. And that’s where my inspiration came from for today’s share.


I wanted to use my cupcake liners to create something unique for this wall decor altered craft. I decided to use the liners to create rosettes for the card. Read on to learn how to recreate these fun and easy rosette cupcake flowers…

1. The first thing I did was open up the cupcake liner and hand drew a spiral shape from the center going outside of the liner.
2. Then I cut along the hand drawn lines.
3. I used a dowel and rolled the liner starting from the edge of the cupcake paper all the way through the center of the paper.


4. I adhered the ends of the rosettes with glue gun to keep its shape.
5. No flower is every done without centers so I used some epoxy stickers from GCD Studios in the center of the flowers. I layered two foam adhesives inside the center of the flower before adhering the epoxy sticker to make the center flat and rose from the bottom of the flower.
6. I added some paint on the edges of the rosette flower to add more depth to the accents and also to show more of the crimpled aspect of the cupcake liners.

So there you have it, quick and easy way to incorporate cupcake liners on your next papercrafting project.Here's some more close up looks of my finished project.  


Live, Laugh, Love wall décor
Size: 5 ¼” square
Products used:
Nostalgia (#1987 Nostalgia Plaid red; #1986 Evening floral; #1992 Nostalgic Cutouts; #1993 Flourish in red); Happiness (#1868, Glitter Epoxy Dots)
Others: Glitter stickers, ribbon, border punch, photo corners, cardboard, cupcake liners, white paint. 

Till next time,
Grace

Monday, April 29, 2013

Monday Video plus a note on an amazing party coming up

Happy Monday friends. I got a video share for you today. It's a bit different as I'm not showing you 'how to' ideas but rather I'm sharing my latest scrapbook purchases. I figured it's part of the overall "inspiration" that I'm trying to give so I hope that you can get inspired with my latest scrapbook haul. 


Also I'd like to personally invite you to an awesome blog and book party that my dear friend Heidi Sonboul is throwing next week. She has a new book out from Northridge and she's also revamping her blog so it's going to be a week full of fun, inspiration and I'm sure fun giveaways. You might even see a special giveaway in this blog as well *wink*. So make sure you mark the dates and join us in the party!


Speaking of a week full of party....I have tons of shares this week so I'm actually blogging for an entire 5 days. Make sure you check back every day as I have a good balance of family stories and crafty shares all packed in one week of blog posts. :)

Till next time,
Grace

Monday, April 22, 2013

GCD Studios PaperCut Magazine Spring 2013

Hi there friends and happy Monday. Today I have a fun share with all of you. As a member of the GCD Studios Design team this year, I was given the opportunity to have a project published in the PaperCut magazine exclusively put together by GCD Studios...


Here's the link where you can see the issue, hot of the press! Check out my project at page 9. I have to say that I was blown away by all of the fantastic projects in this issue and I hope you will too. 

Thanks for stopping by.

Till next time,
Grace

Friday, March 8, 2013

the latest Paper Cut magazine from GCD Studios plus exciting news

Hi there friends. It's funny how I've had so many posts this week. I didn't even realize I had so many thing to share when this week started. Anywhoo....I hope you check out the latest online magazine from GCD Studios...
 
 
Their March issue is full of inspirations and if you read the fourth page, you will find a fantastic news (for me). I've been picked to be part of their 2013 design team. Wow! What an honor. To check out the other talented designers for this year, please click here.
 
Thank you for all of your support and have a great weekend.
 
Till next time,
Grace