Everyone has a story to tell, here's mine sprinkled with some creative projects along the way.
Thank you for stopping by and I hope you come back again.


Sunday, January 9, 2011

Family's first sightseeing around the area

I'm taking a bit of a break with the crafty posts to share some photos of our sightseeing activity yesterday. Mitch didn't have work and since it was a Saturday we decided to go out and be "tourists".

One thing I love about living in Colorado Springs is how close we are to the mountains. I mean, the mountains is literally in our backyard. It took a mere 15 minutes to get out of the city and into roads like these....


We first explored the "Cave of the Winds".


Here are the kids in the front of the cave entrance. I told him to pose with the bear statue and first thing they did was hop on over it. Funny kids!


The cave was on the top of the mountain and they had a place where you can see down to the valley. If you don't know, I'm afraid of heights so to get this photo, I quickly stepped out of the viewing area, clicked the camera and went back inside the lounge.


The cave admission was a bit pricey but in our quest to be "tourists" today, we didn't mind it much. It was good though that we got a discount for Mitch since he was past military.


We were lucky that they allowed cameras (with flashes) inside the cave. There are bats inside the cave but the tour guide said that they were hibernating in a part of the cave where we won't see them so it's ok to use the camera flashes.


Some rock formations that I just couldn't pass taking a photo of.


Apparently when the cave started to become a tourist attraction (which was over 100 years ago) they would let people take stalactites home for souvenirs. The owners back then didn't know that it takes centuries for it to grow back. After learning of this, of course they stopped the practice and have protected the small stalactites growing. Look at these baby stalactites.


There were a lot of places/rooms we toured. Some were narrower and smaller than these. I even bumped my head at one point during the tour. Lesson learned....cannot take photos and tour caves at the same time.


Then after our cave tour we ate lunch at a nearby Wendy's and headed to downtown to visit the Pioneer's museum.


the admission was free so we were very happy about that.


inside they had a wing dedicated for WWll artifacts.


but most of the displays was about life in Colorado Springs in the beginning of it's being a city. These old books were donated by one of the oldest residents in the city.


there were also an area where paintings were displayed depicting the beautiful landscape of the area. I was attracted to this painting cause it looked very unique. It looked cartoonish at first glance.


I love looking at these plates. Makes me wanna find a souvenir shop and get me a Colorado Springs plate to display in my home.


The building that they used for the museum was actually an old court house. They kept one of the court rooms in tact and it was cool being in it. I'm in awe at how much detail in architecture (both inside and outside) was put into this building. It's so awesome.


There were two levels open to visitors in the museum. To get to the upper level you have a choice to either use the stairs or go on one of these old time elevators. It was cool riding on it.


They also had an area where they displayed medicine artifacts during the start of the city. I was very impressed how they got this lot of pharmacy cabinets full of prescriptions they used back then. Very interesting.


On the other side of these cabinets was a ceiling to floor mirror. We took this photo, just for fun.


Here's some photos of us outside the museum


and then after that we went to the old Train Depot downtown. They made the depot into a restaurant but across the street was a park where they placed this...


Mitch read the information that went along with the display and according to it, this train ran for 50 years.


and then on our way home, here's what I glanced upon. It's snowing today so you can see the dark clouds coming upon us but on the other side of the mountains, the sun was setting and it's rays looks like a burst of fire on the other side of the range. So cool.


So there you have it. A glimpse of our new community.

Thanks for stopping by.

Till next time,
Grace

Saturday, January 8, 2011

December Crazy daisy extra projectss

Happy Saturday. Here's my finall installment of the Crazy Daisy December kit marathon posts.

Extra projects for the month of December

Our showcase of projects for the December Crazy Daisy December kit won't be complete without some extra projects. This month it was a card and an altered paper bag...

Christmas bag


The big Christmas chipboard tag was the main inspiration for this project. I love how the tag sums up all that I want to share to the recipient of this bag and its contents.
I used mostly Crate Paper products here although I added the ticket stub die cuts from MME for added interest.


Happy Holidays card


Because I had leftovers of the border stickers, I used them up to dress up this card.
Can you believe that this card has no pattern paper on it? Yes all these goodies are either stickers or chipboard.


Thanks for stopping by. Check this kit and all the other kits, Crazy Daisy has in store here.

Till next time,
Grace

Friday, January 7, 2011

December Crazy daisy mini

as promised here's my take on the mini album that is part of the Crazy Daisy main kit....

December daily mini


I know I'm a bit late making a december daily album but the die cut of the december month from MME was irresistable that I decided to use that as my foundation idea for this mini.
I love the mini for this month. Chipboard minis are always a great book to alter in my "books", no pun intended.
Anyways, I covered the front and back sides of the book completely with pattern papers but opted to just cover 75% of the inside pages. The holes of the book are not your typical circle ones and I thought if I had to make those holes for each page, it'll take me a long time. With this process, I was also able to use up the border stickers and ribbons in the kit.


I used a simple design for all the inside pages and added cardstock where I'll be able to add photos when I get around to it.
The accents/embellishments that came in the kit were perfect to bring this book to life. I love all the chipboard and die cut accents as well as the stickers. There's something for each page including journaling blocks.
For the front and back of the page, I used some of the Basic Grey rubons and other fun accents.

thanks for stopping by and because the kit has so much goodies in it, I was able to make two extra projects with it. I'll show you guys what I made tomorrow.

Till next time,
Grace

Thursday, January 6, 2011

December Crazy daisy kit layouts *photo heavy*

I know you are probably wondering why the heck I'm sharing this when it's already the 6th of January?! Well with the move and getting things forwarded to the new address I actually didn't get the kit till four days ago. I'm not blaming USPS (ok well maybe a litte) for the delay but we all know that when the Holidays arrive, things get really busy.

So without any further unnecessary blabbing from me, here's my layouts...

Precious Moments

My photo has some white space on the top. I didn't want to crop it because it'll make my only photo looks so small in connection with the whole size of the page, I just covered parts of my photo with paper and border strips.
I also used the red as my main color in the page which coordinated very well with the color of the shirts of my kids in the photo.


The kit had some fun heart and red rubons from Basic Grey in it so I used that as accents to this precious page about my kid's being good with each other.
I also used the fabric included in the kit. I used that as my main pattern stitching it dead center on the page.


Christmas Sweets

This page focuses on our candy making activity two years ago. I was too late in purchasing a Gingerbread house kit that all the stores I went to have all ran out of stock of it. Not to damper my kid's Christmas treat making plans, I bought this chocolate candy making treat and this is what we came up with.


I used some papers from Crate paper here with one using as a strip to create a border around the page. This grounded my page. I also added chipboard buttons on each corner.
I scored an old typewriter from Mitch's shop when they closed and I've been using it like crazy lately in all of my projects. I love how easy it is to type up my journaling without the fuss of computers and printers. The only draw back, I need to make sure my spellings are always correct on the first type.


Visiting with the Big Man!

This was my first page to make with the kit. I love the Crate Paper and couldn't resist using it as my main background. Because the paper's already loaded with fun designs, I chose to go a little simple with the rest of the design. I didn't want the page to look too much. I did however wanted to add strips of paper, border stickers and die cuts to the bottom of the page, so I used a craft knife and cut some slits through the bottom of the Christmas tree pattern so slide my strips of papers into it. I used one of these strips as a place to house my journaling as well.


The pictures in this page is another example of how grateful I am for people that gives me copies of pictures they took of my kids/family. In this one, a sister in our ward took all the photos of each kid that came and visited with Santa during a church party. She then printed them off and gave to the parents. What a lovely service, don't you agree?!


All I want for Christmas

This is my two page spread for the month. Because I am way behind on printing photos, I was very grateful when I found these photos of a Christmas get together we had at my mom's. She was kind enough to order extras of her prints to give to me. Gotta love that!
I used the more vintage inspired papers from My Mind's Eye for this page plus the die cuts too.
I also added the ribbons with the sayings on them and a chipboard tree from the Crate Paper pack.
To add some design to my blocks of pattern paper, I cut the sides with a special postage attachment for my paper trimmer. This method gave it more personality with just adding a different cut to the sides.


A Prized Possession

Although the kit is mainly themed for December events, I loved the reds in it that I thought of making a layout about my love for designer bags especially with a bag that my Aunt gave me as a gift.
I used the back of one of the Jillibean soup paper as my background. I love the Kraft cardstock look for this page. I also used the greens and red here but only used the reds to a minimum so it won't look to Christmasy.


thanks for looking and make sure you stop by tomorrow. I have the mini to share.
To learn more about this and other Crazy Daisy kits, click here.

Till next time,
Grace

Friday, December 31, 2010

10 favorite layouts of 2010

Today's the last day of 2010. I can't believe another year is almost over and not to mention another decade! But before I say adieu to 2010 I wanted to share my 10 most favorite layouts I made this year. It was hard to narrow it down but going through my file, these are the ones that stood out the most....so in no particular order....

1. 10 reasons

Everytime I make a page about my feelings about hubby is a special page to me. Plus the photo is also one of those ones that I treasure. I also loved how I played with some misting techniques here.

2. 1st day of 1st grade


Can't believe my son's growing like a weed. I love this page because he had a great haircut (one of the few times I give him a good buzz) and all the fun layerings I was able to do with the products.

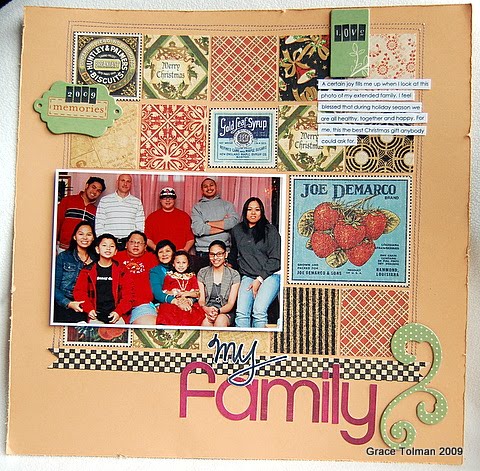
3. My family


this one is a fave because most of my family is in one photo. This is becoming really rare nowadays. Plus all the fun vintage papers that was added to give that antique/precious feel to the page.

4. Mister Personality

How can I not add this to my fave this year? I love my son's photo. Oh how darling he is in his church shirt and tie plus that smirk and the folded arms. How can you not love that?! Oh the page was fun to make too.

5. A mother's love

love this page because of the fun photos of me and kids holding a flower vase that they gave me for Mother's day. I also had fun going through all the Upsy Daisy Designs paper collections to punch out my butterflies.

6. I am blessed


Truly feel blessed everytime I look at these photos. I also love how I added transparency over acrylic tags to add a subtle design.

7.Snow Fight

I love this because of the fun snow fight between my son and husband captured on the photo. This year, I really tried to get out of my comfort zone and try some new techniques. Sprinkling glitter over my title was one of those techniques I tried this year.

8. A Dreamer

this photo is one of my favorites this year. It was one of those lucky ones that I had concocted in my head and when I tried to execute it, it actually worked! I also love how the colors of the papers and embellishments makes me smile.

9. Be true to you

this page is so sweet and feminine which is the best descriptions for my sweet daughter. I love Maddie's smile and her curly hair on the photo. I also love those sweet floral ribbons sprayed with glimmer mist to match my layout.

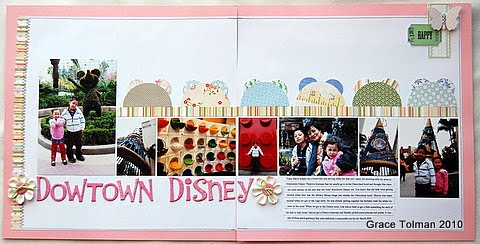
10. Downtown Disney

I had a hard time picking my favorite double page spread. I love them all but this one exudes fun to me. A thing that you can almost, always see in my layouts. I also love how I made my pattern papers look like Disney ears to match my layout theme.

So that's it. Thanks for stopping by and Happy New Year to all.

Till next time,
Grace

Thursday, December 30, 2010

Our Christmas Morning

Here's how our Christmas morning shaped up. Sorry it's a bit late. That's my story lately.

The kids have been waking up earlier than we have for the past few days (Kids go to bed at around 9pm while Mitch and I stay up watching TV till 12 0r 1 am) Anyways on Christmas day they didn't make any fuss but Mitch decided that at 7:45 we were going to wake up and start the opening of the presents. I was not happy being waken up that early but I forced myself to get up so I can take photos.
He told me that he would just let the kids open their presents while I stay in bed. Is he nuts? Sometimes I wonder if he really knows me. I mean c'mon, I'm a scrapbooker. Why on earth will I sleep in while my kids open their presents on Christmas morning????
Anyways here's some photos of the morning...


It's funny how the buying of presents took a whole month and the wrapping was about 2-3 hours to do and all this work for only about 15 minutes of wrapping paper ripping and a few oohhhs and aaahhhs. There were even no screeching or screaming for surprise.


Marcus got a lot of stuff. This box is from Grandma and Grandpa Tolman's. It was a sweater. Somehow we all knew that was coming. :) He also got two DS games and a pair of pants from Lolo and Lola


This was from Uncle George and Aunt Alleli


Santa even gave the kids each a personal letter. Here's Marcus trying to read his' all by himself.


Then here's Maddie with her sweater from Grandma Tolman. Maddie also got a Princess Jewelry set, princess toy celphone and an outfit from Lolo and Lola.


Then a DS from Santa. Pink! a perfect gift for this Pink Princess.


Then here's Mitch opening up our family gift from Santa and it was a....


WII!!! Yes we've been that good that we finally got a WII.

and as for me, I got this....

I guess I was pretty good this year too. *wink*

and here's the mess afterwards.


and after opening up the presents, we ate this for breakfast...

I made a breakfast casserole (prepped the night before) some cinnamon rolls and apples. Plus eggnog to drink. Yummy!

So that's it. Hope you all had a great Christmas and wishing you all a Happy and Blessed New Year.

Till next time,
Grace

Monday, December 27, 2010

Temple lights

I know it might be a little late to show Christmas related project but I know that most of the people out there still have their Christmas lights on so I think I'm still within the "time frame".

Anyways here's a layout share featuring some wonderful acrylic pieces from Clear Scraps...

Temple Lights

I used the buckle shaped frame to house my title. For my papers I used the Jovial line from Basic Grey and added some lace, ribbon and flowers to add texture to my page. I also personalized my frame around the page by punching a decorative border from the paper, cut it out and adhered it with pop up dot. This way, there's a distinction between the design of the border and the design of the background paper.


for the frame, I added glitter on it. To make this a super easy (but messy) technique, I just ran some of the Tombow vellum adhesive onto the acrylic piece and then dumped glitter on top of the piece. I pressed on a little bit to make sure that the glitter gets adhered really well onto the acrylic. I will warn you though that it's a pretty messy job so make sure you do it with paper underneath so you can catch all the excess glitter.


I also added a little acrylic ornament that came in the Believe Clear N Chip pack. I smeared some bronze powder on it to add color and then made a flourish with liquid pearl. Make sure you let it dry before adhering onto the frame.

To that's it. Make sure you check the Clear Scraps items used here and all the other cool stuff Clear Scraps has to offer here.

Thank you for stopping by.

Till next time,
Grace