Everyone has a story to tell, here's mine sprinkled with some creative projects along the way.
Thank you for stopping by and I hope you come back again.


Showing posts with label mini album. Show all posts

Friday, February 19, 2016

My December Daily 2015 finished album share

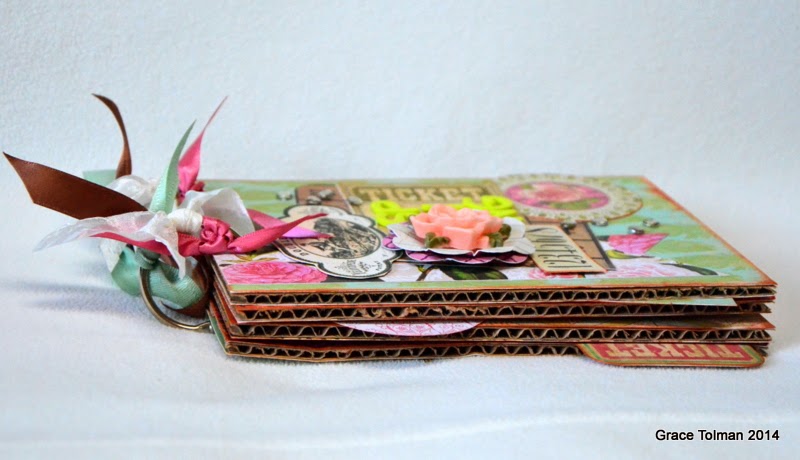
Happy Monday friends. Today I'm sharing my finished December 2015 memories album. I am also going to share with you some of the things that I've learned along the way. 
I actually put together a few videos regarding this album. If you wanna watch it, just click play on the following video....

To see what I had put in my Dec. Daily album kit...


What my album looked like at the end of December...


A visual share of my album after it was all done...


If you didn't watch the last one and want to know the lessons I've learned along the way, they are the following...
1. Don't add the word "daily" to my album. Because I didn't add any wiggle room for possible failure in the daily photo taking part of this project, I set myself up for failure because I had the word "daily" in my album title. I don't want to do that again next time, in case I am not successful in capturing every single day of my month. 
2. Write the journaling part of the pages on a scrap paper. After I have finished all of my pages, I sat down and just started jotting down my feelings/memories about each day/page. This helped me iron out my words and eliminate any typos or mistakes on my journaling. Plus it helped make the typing or writing part of the journaling fast, because my words were already there. 
3. After finishing the book, instead of separating all of the items back into their regular places (ie papers in paper stacks, stickers in their respective containers, etc) I combined them all in one bag and labeled it Christmas products. This way, they were all together and every time I need to make a project that has this holiday theme, everything is in one bag/spot. 

Additional lessons...
1. Don't stress if you don't get it done in the month of December. I feel that there are far more important things to worry about than getting an album done by December 31st. It has helped me be "present" during this special time of the year. 
2. Fill in the pages of your album with memorabilia like wishlist. Just create a pocket or envelope to hold the ephemera. 

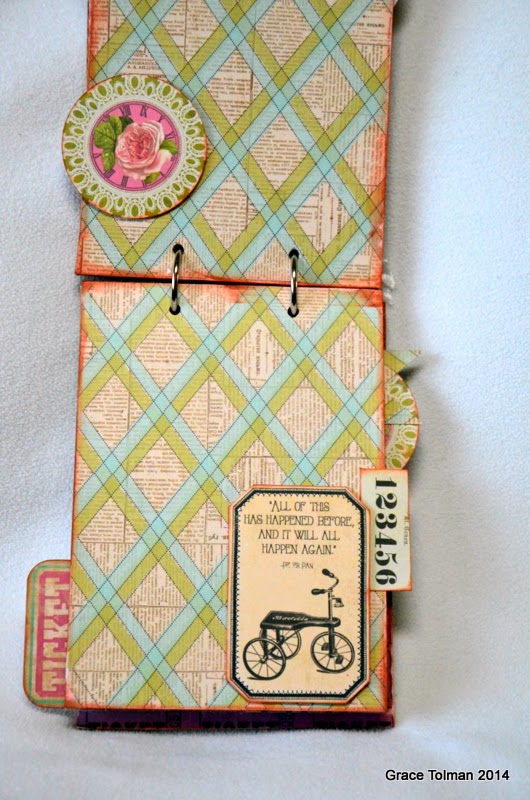
Here are some more close ups of my album and the inside...


Thank you so much for stopping by. I hope this share gave you some ideas for your next mini album project.

Till next time,
Grace

Thursday, August 27, 2015

Four Mile Historic Park minibook + process video

Hi there dear friends. Today I'm sharing with you a minibook that I created recently. I haven't really done any mini book lately because 1. I am running out of room for them and 2. I felt like my pictures and stories need to be put into the albums versus in smaller books that can be lost or misplaced. But this particular event had way too many pictures and I had a hard time cramming them into one double page spread. I also wanted to challenge myself and see if I can created a minibook that is my style from a predesigned album kit. Here's the result...


You can see my process, including the items that I gathered for this project in the video below...

Here are a few things I learned from this process:
1. It is possible to create a project that is within my style from a predesigned album kit. It's just a matter of tweaking the accents or embellishments and some parts of the original layout design.
2. It was fun working with precut papers and accents. It made the process faster. I was able to get this book done in 3 hours. That's a first for me.
3. Gathering all of my items to create this book also made the process efficient. Since I have everything I needed within arms reach, I didn't have to stop my creating to rummage through my stash for items.
4. Creating a minibook helped me use up my stash faster than making a layout or two. Because I'm trying to create repetition within the pages of this book, I used some items over and over again like photo corners, stickers, pearls, etc. It helped me make a huge dent to my stash.
5. Having typed journaling to sprinkle within the pages of the book helped to ensure that the stories that can't be viewed with the photos are also added to the book.

Here are some close ups....


And there you have it. A finished mini book in under 3 hours. Thank you for stopping by and if you liked this kind of post, please leave a comment and I will make sure to make some more projects in this category.

Have a great day.

Till next time,
Grace

Wednesday, October 22, 2014

Today mini book *Ribbons Unlimited Inc.

Hello there friends. Today I’m sharing a mini book project that I created using some 4x6 pocket scrapbook papers. Pocket pages and scrapbook supplies are a rage right now. While I don’t do project life, I still like to get the products cause they’re so cool. Recently, I got a pack of 4x6 papers designed for pocket scrapbooking. I used it as a base for my mini album. I then put it all together with a coil binding.  Because the papers were already cut into one size, I was able to put this book together in record time.


To spruce up the front of the book, I tied some colorful ribbons from Ribbons Unlimited Inc.


Here are a few pictures of the inside pages of the book…


I hope this inspired you to use those pocket scrapbooking products in your next mini album project.

Happy Creating,
Grace
Supplies Used:
#995 Grosgrain stripes, Yellow, 3/8”, Ribbons Unlimited Inc.
Grosgrain, Stripes, 5/8”, Ribbons Unlimited Inc.
Country check, Red, 1”, Ribbons Unlimited Inc.
Lilac Leopard Grosgrain 5/8”, Ribbons Unlimited Inc.
Giraffe 7/8”, Ribbons Unlimited Inc.
Edinburgh, Dress Stewart, 1”, Ribbon’s Unlimited Inc.
Papers and border stickers- Ruby Rock It
Letter stickers- My Little Shoebox
Cardstock- WorldWin Cardstock
Bind it tool- Bind it all, Zutter
Pen- Millennium, Zig

Enamel dots- homemade

Wednesday, September 10, 2014

Denver Botanical Garden mini *Inspired By Stamping*

Hello friends. So the kids are now back in school and you have the time to document those vacation photos. Well I'm here to share with you one of the ways I document travel photos. If you're like me, there are TONS of pictures from one trip. I just can't help myself, I want to be able to capture all of the memories from that trip so I get a little "trigger" happy with my camera. About three years ago we took a day trip to a nearby botanical garden. They were having a "free admission" day and we couldn't pass it up. When I printed my photos, I had over 12 images to document and I knew that a double page layout wouldn't be enough room for all of it so I decided to make a mini album instead. Here's the finished book...

denverbotanicalgardenmini
 

I started with an old board book that I had cut out the inside pages into thinner strips to have an accordion style mini.
   inspired by stamping

I then covered each page with pattern paper, added my photos and then used the IBS Fancy Labels dies 3 to create some unique labels to add my stamped words and images. Here's a collage of what the finished book looked like, inside and out....

  inspired by stamping1

I hope this project inspired you to document those travel photos soon. Recycle a board book and see what you come up with. -Grace

  clip_image013.jpg

clip_image013_thumb.jpg

clip_image018_thumb.jpg

Others: Pattern papers (Basic Grey); Chipboard butterflies (Studio Calico); Pearl stickers (Recollections); Letter stickers (American Crafts); Ink (Tsukineko, American Crafts); Pen (Millennium, Zig); Embossing powder (Hampton Arts)

Friday, June 6, 2014

Marion Smith and Glue Dots Spring Blog Hop

Hello friends.
Today I'm excited to be a part of the Glue Dots blog hop. We are featuring the desktop holder along with some beautiful products from Marion Smith.

Marion Smith products are available at Scrapbook.com and BlueMoonScrapbooking.com for online ordering. 

Glue Dots® products, including the new Desktop Dispenser, are available online at Jo-Ann.com or at your local Jo-Ann Fabric and Craft Stores.


For this hop, I decided to use the products to create a Spring themed mini album.


I'm trying to use more of what I got so I decided to cut out the foundation of the album sheets from cardboard that I've had for a while and then cover it with the Marion Designs paper.


Instructions:
1.Cut out four 5 x 7" sheets from cardboard. Cover with paper. Distress and ink the edges.


2. Decorate the front cover of the book. Cut out designs from paper and adhere to the front using the Glue Dots adhesive. Add the title using stickers.


3. To create the layered flower, punch out two flower shapes from pattern papers. Crinkle and crump the edge to create dimension. Adhere the flowers over each other. Add a rose embellishment on the center using two Glue Dots Pop Up adhesive. Add the rhinestones on the front of the book using the Desktop Glue Dots dispenser.


4. Punch out two holes on the top of the mini book sheets. Connect the books together with book rings. Add some ribbons around the rings for added embellishment.
5. Decorate the inside pages of the book using more handcut designs from pattern paper. Add some with Glue Dots Pop Up adhesive to add dimension inside the book.
6. Add a strip of rose paper on the back of the book. Repeat the process to create the dimensional paper flower (refer to step #3) and add a punched out circle accent.

Now your book is ready to save some beautiful Spring memories.

a Rafflecopter giveaway

Thank you for stopping by. Make sure you check out the rest of the Glue Dots team for this blog hop. Here's the list....
Dawn Barrett
Donna Budzynski
Erin Bullock
Joy Dickson
Jessica Griffin
Danielle Hunter
Smitha Katti
Samantha Taylor
Grace Tolman


More blog hop info can be found at the new Glue Dots blog here.

Supplies Used:
Glue Dots Pop Up Adhesive
Glue Dots Desktop Dispenser
Papers and Embellishments- Marion Smith
Flower punch, circle cutter and corner rounder- Creative Memories
1" circle punch- EK Success
Ink- Cayenne, SEI
Others: Book rings and cardboard