Everyone has a story to tell, here's mine sprinkled with some creative projects along the way.
Thank you for stopping by and I hope you come back again.


Friday, October 4, 2013

It's great to be 8

This sassy little girl turns 8 today. 

Scrapbook page circa 2009

And so in a week, she'll be getting baptized. In our church we believe that the age of accountability is eight and that's when most of our children gets baptized. This is a special time in their lives as they make the important promise to the Lord to keep His commandments and follow His plan. We are very happy and proud of Madelyn. You can learn more about my beliefs in baptism here

I took Maddie out for a special "photo shoot" a few weeks ago and here's some images that ended up in her baptism invitations...


Is it ok that my heart is aching a bit when I look at these images? My baby is growing up!

Have a great weekend.

Till next time,
Grace

Tuesday, October 1, 2013

Fright Night Frame *Paper House*

Hi there friends and happy first day of October. This project is actually part of my September projects with Paper House but I thought of sharing it on the first day of October since we are celebrating Halloween this month. 

Fright Night Frame
Size: 8 x 10

Supplies Used:
Papers- Halloween Collage (P-0508E); Trick or Treat (P-0506E); Fright Night (P-0505E)
Stickers- Haunted House (STDM- 0098E); Happy Haunting (STDM- 0099E)
Rubons- Happy Haunting (RUB GL-0039E
Others- Twine, Frame, Cotton, Border punch, Adhesives

 The glass part of this frame accidentally broke but I liked the simple black frame so I kept it. It was the perfect foundation for my newest Halloween home décor project. I loved the dimensional stickers that Paper House carries. With them, I didn’t need to add to much more to create this spooky project. To continue with the “dimensional” aspect of this project, I added some cotton around the top of the page to mimic fog and clouds.

Instructions:
1. Cut out the title “fright night” from paper. Adhere to the right side of the frame backing. Cut out a 5” wide of Trick or Treat paper and adhere to the left side of the page. Punch out a border from Halloween Collage paper and trim into a strip. Adhere over the other two papers. Cut out a ½” strip from the Fright Night paper. Fold and scrunch up paper to create some dimension and adhere over the scallop paper border. Cut the two ends into notches.  Place the frame backing with the frame and secure.

2.  Adhere the stickers. Create a spider web going down to the spider sticker with twine. Adhere the top end to the back of the frame.

3. Add some bat rubons to the top left side of the frame.


4. Pull out some cottons from a cotton ball until you have your desires “cloud” look. Adhere to the frame.

Thanks for stopping by. Be sure to check out all of Paper House's latest collections here

Till next time,
Grace 

Friday, September 27, 2013

Latest Published Projects

This week I reminisce on the good 'ol days of when there were plenty of scrapbook and card magazines to choose from. Remember Memory Makers, Better Homes and Garden's Scrapbook Etc. and Simple Scrapbook? 

Like most publications, scrapbook magazines are deciding to go digital. There will only be a handful of crafting magazines that would offer their content in print format next year. This really makes me sad and that's why I am treasuring my latest complimentary copies of the issues that I've been published in. Here are the latest two, in print...

Homemade with Love
This layout was featured in this magazine from Creating Keepsakes...


And this layout, which I made for Die Versions is found in the latest Scrapbook and Cards Today Fall issue...
Archibald Farm layout

They also offer this magazine in digital format, free for everyone to see. Check it out here

I don't know about you, but something about curling up in the couch or on the bed with one of these inspirations in my hand is one of my most favorite relaxing activities. What is your favorite part of a crafty magazine?

Till next time,
Grace

Thursday, September 26, 2013

Field Day 2013

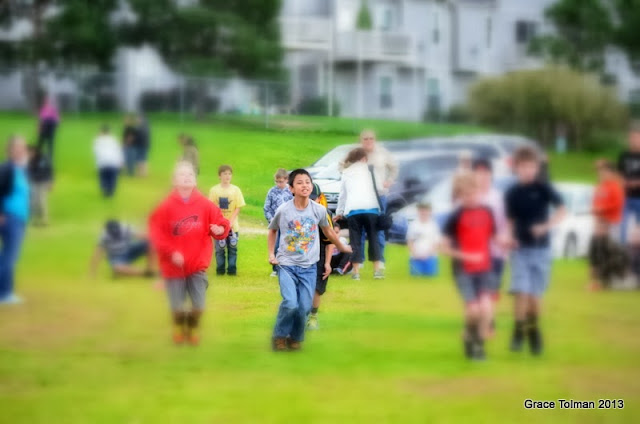
Another school year and that means another Field Day for the kids. This year fell on a Thursday and the weather was, at best, mild. The sun would show up once in a while but for the most part, it was a bit chilly. But that didn't stop the kids from enjoying the many events planned. Here are some photos from Field day 2013...

This year the school changed up the schedule for field day. They had the younger grades (K-2nd) do their events in the morning while the older kids (3rd-5th) had theirs in the afternoon. It was a good thing, as I was able to be with each kid throughout their activities without worrying that I'm missing out on the other's events.


Maddie got an assortment of ribbons ranging from 1st to 4th.


Marcus on the other hand got a 2nd, 3rd and a few 4th place ribbons.
He almost lost one, which caused him much distressed (a meltdown that I don't really want to elaborate on) but thank the heavens...it came up and his world was normal again.


I love the energy on this boy. You can tell he was putting his best efforts in all of his events. He even got a 2nd place ribbon for the 40 yard dash and he was competing with one of the best athletes in school.


And that's it! It's honestly hard for me to talk about this year's Field day and not sound redundant from the previous years' notes. So all I'm going to add now is that..... it's great....the kids tried their best in their individual events...and that....nobody got hurt. I say that's call for some celebration.

What school activity do you enjoy attending?

Till next time,
Grace

Wednesday, September 25, 2013

Latest Die Versions projects

October hasn't even arrived yet and I have Christmas in my brain already. Blame it on the beautiful products that I've been getting as part of my design team commitments. Die Versions released Christmas themed dies this month and I got to use it for a layout about one of my family's new Christmas tradition...making fudge. I also used it to create a Holiday themed card. Check them out below...

Tis the Season to be Jolly layout
Featuring:
DVH-003 “Holiday” Half Pints
DVE-037 “Believe” Express Edges
DVW-285 “Christmas Word Tree” Whispers

Notes:
I decided to use three dies in my page. I cut them out from the same paper, helping me create a visual triangle between them. I didn't need to add too much after than since the dies perfectly convey the theme of the layout.
I wanted to use this vintage pattern paper in the background but didn't want the photos and dies to clash with its design so I adhered a piece of vellum paper in between my background and the rest of the items in the page to make that distinction.

Peace, Love, Joy card
Featuring:
DVCC 007- “Peace Love Joy” Cute Cubes

Notes:
Layering pattern papers and journaling block plus adding the cute cube die made for an easy and well put together Christmas greeting. 

To learn more about these and the other fantastic products that Die Versions offer, please visit them here.

Till next time,
Grace

Tuesday, September 24, 2013

Mitch's Birthday Celebration recap

Last week hubby turned a year older. His special day fell on a Tuesday and because of work and school plus my church calling, there was no way we could celebrate that day. So we ended up celebrating a bit early. We tried a local Mexican restaurant called Amanda's Fonda on Saturday night. Here are some photos of our dinner celebration...


This was our first time to eat here so we didn't know what to expect. Even though the ambiance looked good and the service friendly, the food was not comparable to the yummy food we were used to back in Southern California. Unfortunately, we were disappointed by another local Mexican place. Makes it harder not to miss So Cal and the diversity and authentic food we had there. :(
I tried their combo plate with tostada and enchilada

Mitch had the taco and enchilada plate.

Marcus and Maddie both had taquitos kids' plates.

The following day (Sunday) we fed the missionaries dinner so I made a German Chocolate cake with the Pecan frosting that Mitch likes as a dessert so we can sing to him and have him make a wish. He didn't even want us to put candles in there. I guess he doesn't want anymore reminder that his "numbers" are going up. 


Over all it was a pretty good birthday. Even if it was celebrated a few days early. :)

What's your favorite tradition for celebrating birthdays in your home?

Till next time,
Grace

Monday, September 23, 2013

Latest Epiphany Crafts Projects

Happy Monday Crafty friends. It's another start of a week. What's in your agenda? As for me, I am plugging along with my school homework. I have totally forgotten how much reading that entails. I'm more of a hands-on learner, so having to read chapters and chapters in a Science book doesn't really excite me. But I know that I just need to plug along. I also plan on spending some time in my craft room this week. Now, that I'm excited about! 

Speaking of crafts, here are two Wedding theme cards I made recently for Epiphany Crafts. You can see these cards along with supply list and instructions on how to replicate them in this post.

Happy Ever After card

Mr. & Mrs. Card

I am honored to be a part of the Epiphany Crafts design team for 6 more months. With this new term...EC decided to share a little bit more about the each member of the team in the blog. You can find my Q&A in this post

I really feel blessed to be a part of this industry and have the opportunity to create. I don't think I can ever live without paper, glue and the possibilities of creating with them. 

Have a happy Monday.

Till next time,
Grace


Saturday, September 21, 2013

Happy Thanksgiving card (Paper Secrets sketch) *Inspired By Stamping*

Happy Saturday. Today's special post is my take on the latest Paper Secrets card challenge sketch. Inspired By Stamping is sponsoring the card sketch challenges at Paper Secrets this month and their latest design is this...


and here's my take on it..

Happy Thanksgiving card
I used one of the latest stamp sets from Inspired By Stamping called Happy Fall. I used the leaves as my "triangle" inspiration based off of the sketch. I also picked my "fall" type colors of paper to match my stamps.


Stop by the Paper Secrets blog here and play along. There's a sweet prize that awaits the winner. 

Have a great weekend.

Till next time,
Grace

Friday, September 20, 2013

Huntington Beach layout *Paper House*

It's project share time again. 

I'm super excited to be sharing my first project for Paper House since being officially chosen to be in their design team. I was given a lot of paper designs to work with and my first project features some beach themed designs. 

Huntington Beach layout
I loved the Beach paper line from Paper House. The glittered papers were really cool and I wanted to incorporate that on my page so I cut them out using some fuzzy cutting technique and adhered them to the corners of my page. Because some of the papers from the line had some big bold photo designs, I added the sand pattern paper over them so I can have a clean background for my photos and embellishments.

Supplies Used:
Papers- Sand Pattern (P-0450E), Beach Snorkel (P-0446E), Ocean Breeze (PGL_0021E), Getaway (PGL-0020E), Beach Chair (P-0447E)
Stickers- Life’s A Beach (STDM- 0028E), Fun Beach 2 (STCX- 0163E)
Others- Letter stickers, Pen, Tag Punch, Adhesives

Instructions:
1. Cut out two Sand pattern papers into 11 ½ x 11” pieces. Adhere to the center of the Beach chair papers.

2. Adhere the photos to your layout.

3. Handcut the glitter accents from the Getaway and Ocean Breeze paper. Adhere the cuts on the edges of the layout.

4. Cut a strip from the Beach Snorkel paper measuring 8 ½ x 1 ½”. Cut the long ends into notches. Add the title stickers. Cut in the center and adhere to the layout.

5. Punch out two tag shapes from Beach Snorkel paper.  Tuck under the left bottom photo and adhere to secure.  Handwrite your journaling.


6. Decorate the page with both flat and dimensional stickers from Paper House.


This was definitely a fun project to create. To learn more about Paper House products, please click here

Till next time,
Grace
Wednesday, September 18, 2013

Quote laser cut frame *Inspired by Stamping*

It's me again. We had some major rains in the area last week. Thankfully we were spared from having to deal with basement flooding. Our home is not in the area where we would have been affected by flash flooding but we have had an issue before where water got into our basement and you can even read that story here. I have seen some images about the effects of the flooding in and around our area and my heart aches for all of those affected by it. Mother Nature sure knows how to keep us Coloradans on our toes. If it's not wildfires, it's flash flooding. 

Anyways, because after every rain comes the clear blue skies and greener grass, I figured I'd share a post about an altered frame I created for this beautiful photo of a flower. I shot this image at the Denver Botanical Garden a couple of years ago. I love the light purple color of the flower and the way it hung on the branches. 


I found this wood frame at the clearance section of my local Michael's store. I love the intricate design of the frame. I wanted to show off the beauty of this frame so I decided to paint instead of covering it with paper. Besides, with all of the intricate design, it's going to take me forever to do that! I then added some stamping (using Inspired By Stamping stamp sets) and pen lines then added my image. I love that quote as well, it very much sums up faith and hope for me.

Supplies used:

Frame- Laser cut frame, ArtMinds; Cardstock- (yellow) WorldWin Papers, (kraft) The Paper Company; Stamps- (lines) Friendly Flowers, Paper Smooches, (quote and banner images) Words of Inspiration, Background Basics ll and lll, Inspired By Stamping; Twine- The Twinery; Pearls- Le Crème, Baby Bling Pearls, Want2Scrap; Embossing powder- Black, Zing, American Crafts; Ink- Stazon, Tsukineko, Memento, Tsukineko, Colorbox; Toothpicks- Source Unknown; Paint- Victoria Green, Apple Barrel, Plaid; Adhesives- Xyron, Glue Dots

Instructions:

1. Paint the frame with acrylic paint. 2. Adhere the photo on the back of the frame. 3. Stamp the stitch lines on the frame. 4. Stamp the background images on kraft and yellow cardstock. Trim into banners. Adhere to toothpicks with Glue Dots. Tie the two picks with twine and adhere to the top right corner of the frame using foam adhesive. 5. Heat emboss the quote on yellow cardstock block using black embossing powder. Mat on kraft cardstock. Adhere to the bottom left corner of the frame. 6. Add pearls on the bottom of the quote. 

Thanks for stopping by.

Till next time,
Grace