Everyone has a story to tell, here's mine sprinkled with some creative projects along the way.
Thank you for stopping by and I hope you come back again.


Thursday, June 27, 2013

Father's day 2013 recap

I know this is a bit late, but like the old saying goes... "it's better late than never!" 

Our Father's day festivities started the day before Sunday. Since our family tries to keep the Sabbath day holy, all of our eating out or shopping are done on Saturdays. To celebrate our "father", we had lunch at a Mexican restaurant called "Acero's" that Mitch heard great reviews of from his co-workers. I didn't bring my camera (I was too lazy to lug the big camera along) so I captured the memories through my Ipod's camera. 

Here's a collage of how our Father's day lunch looked like...

Calories were definitely thrown out the door during this meal. Mitch ordered a combination plate of Enchilada and burrito while I chose sopes with salad on top. We were debating if we should get the kids' children plates but Marcus seem to be having a more "adult" like appetite so we ended up getting him a three taco plate. Maddie got a kid's plate of quesadillas. Everyone got rice and beans with their orders and Marcus, surprisingly, really liked the rice. 

On Father's day I was inspired to make a Lemon coconut cake from scratch with cream cheese frosting.  You can really tell the difference between a cake from scratch from a boxed one. They are more fluffy and full of flavor. I took a picture of my finished cake compared to the one in the cookbook. Of course mine is amateur looking but it still tasted good. :)


We also got Mitch a box of See's candies (his favorite) and lots of hugs and kisses. That was how we celebrated Father's day at our home. How did yours turn out?

Till next time,
Grace

Wednesday, June 26, 2013

With Sympathy *Cardabilities sketch #76*

Happy Hump day friends. Today's share is a card made with the latest sketch from Cardabilities in mind. You can play along with the latest challenge here

With Sympathy card


We had a good friend recently pass away because of Cancer and I had her family in mind for this card. I went with a more muted color scheme since this is not a cheery card. I did add some yellow and orange for a pop of light, which for me, denotes hope.

I used stamps from four different stamp sets here, all from Inspired By Stamping. The flower was from this set, the borders from this and this and the sentiment from this. Make sure you stop by the store for more eye candy and inspiration.

Thank you for stopping by and I hope you continue to have a marvelous week. 

Till next time,
Grace

Tuesday, June 25, 2013

Patsy's candy store excursion

One of the things the family and I wanted to do this Summer is to explore our city a bit more. It's only been  a little over a year since we've moved here and we feel like there's still a lot more places to see, do and experience. 

I've heard that there was a candy store in town that is apparently comparable to See's candies. I also learned that between the months of May and September, they allow store tours for free. I thought that would be something that the kids would enjoy so on a Thursday afternoon, I drove me and the children to Patsy's candy store to see how their candies were made and of course, to get a little sampling of it. *wink*

Here are some photos of our candy factory adventure...


The tours were set at a certain time of the day. One in the morning and another one in the afternoon. I was a little worried when we came into the store a few minutes after the set time for the afternoon tour. I thought that we were so late that we wouldn't be able to go on the tour. Luckily there was a big crowd for that time slot so they ended up dividing the tourists into two groups and we made it to the later group just in time. 

All tour participants were asked to wear a hair net. Marcus didn't want to wear his, but the tour guide/candy lady told him that he can't go in the factory without the hair net, and my boy obeyed. 

Unfortunately we were not allowed to take photos during the tour. I was not able to capture all of the neat machines that made taffy, caramel, popcorn and chocolate. I would have to say that it was a surprisingly interesting tour. The history of the place was fascinating. All the machines were built between 1940-70, and all of them are still in operation. Amazing. 

The only thing I would do differently next time is to call ahead to see what they are making that day. Unfortunately, the old taffy and caramel production line was not being used on the day that we came. Apparently, not all machines/stations are in operation during this time since it's not the store's busy season. I would have liked to see those big taffy pull machines at work while there. 

After the tour, we got to have a sample of the taffy and some caramel popcorn. It was delicious that we couldn't just leave after that. We ended up wandering the front store a little bit longer to see all of the chocolates and candies packaged and ready to eat. 


Look at all of these handmade chocolates and truffles....

They even have "artisan" ones. We learned (through the tour) that the store contracts an artist that paints the chocolate eggs during Easter time. That sounds very impressive. 


The price of their chocolates are a bit high. We ended up purchasing four small caramel candies and one toffee bar that cost us $3. That doesn't sound too much but I don't think our chocolate even weighed over 2 ounces. Definitely a splurge, but it was worth it. The candies were very tasty!


So that's our latest excursion. Hope you enjoyed our little review of the Patsy's candy store and tour. If you are local or planning to be in town and is looking for a tasty and educational tour of a candy factory, this is a must see. :)

Till next time,
Grace

Monday, June 24, 2013

Summer ideas with Die-Version dies

Hi there friends. This week is a big one for me, I am holding my 2nd year of Summer Craft Camp for some local kids and I'm super excited. I'm also a little bit nervous. I guess this all comes with the territory, especially if the event was months in the making. I will let you know how it all turned out next week. 

I'm starting this week of blog posts with some project shares. Die-Versions released a fantastic set of dies this month and it's all about summer and water fun. You can see the whole set here. I love how the dies inspired me to enjoy the season and have some summer fun with the following projects...

Hello Sunshine layout
This was an old photo that I just love of the kiddos. About 4 years ago we went on a camping trip to Silverwood lake where we used my husband's canoe to paddle around the lake. This photo was taken while we took a rest at a nearby shore. I love how my kids are always ready to "ham it up" infront of the camera for me. They are the best! 

I decided to have fun with the fish dies here and cut them out with pattern papers and glittered cardstock. I added some googley eyes for the extra "cuteness" factor! You can read more about this project on the Die-Versions blog here

Hello Sunshine card
This was another fun summer themed project that I truly enjoyed creating. If you scroll back up, you'll notice that the title of my card here is originally from a circle cut (you'll see it on my layout on the top left side). I wanted to add the whole word in the inside of my sun but my card was too small to fit my original plan, so I decided to cut out the words from the circle and make them into one long title on the bottom. 

You can read more about this card in this blog post from Die-Versions. 

So that's it my friends. Some summer project ideas to help you start your inspired week. 

Till next time,
Grace

Thursday, June 20, 2013

New Specs for Marcus

Remember this post about my son getting his first pair of prescription glasses? Well that was over a year ago. He was very excited about it for a couple of weeks but the excitement wore off and he refused to wear them ever since. Well I had a meeting with his Pediatrician recently. I told her that he has refused to wear his glasses and she suggested that we bring him back to the Ophthalmologist to see if his prescription changed. 

About three weeks ago we went back to the eye doctor. The good news is that his eyesight was much better than a year ago. The bad side (cause there's always the negative side, right?) One eye was working harder than the other so she gave him a new prescription to correct that issue. I made Marcus pick his frame with hopes that he'll want to wear it more often if he chose the design of the frame. 

Here's what he chose...


The eye doctor made a deal with Marcus. The plan was that he doesn't have to wear them all the time but she wants him to wear it when he's working on the computer or reading a book. Those where the only times it's a "must wear" item. 

Marcus shook the doctor's hand and called it a deal. Now here's my little man with his new specs...


Now it's my turn to shop around for some new specs. His new glasses are inspiring me to get a thicker frame for me too. It looks very "Clark Kent". Don't you think?

Till next time,
Grace

Wednesday, June 19, 2013

Handmade Checkers Game Set *GCD Studios Special Delivery Collection*

It's Wednesday and that means we are halfway through the week. I'm plugging along, how about you? Well if you have sometime to be crafty today, how about this for an inspiration?

Fourth of July means BBQ, family time and for most of us, picnic gatherings. So today, I’m sharing a handmade checkers game that can easily be transported to your next picnic party. It will provide lots of fun for you and the family. 


Here’s how you can create your very own game board and envelope storage:


1. Choose your papers. I used a combination of subtle and colorful designed sheets. You will also need some chipboard circles for the game pieces, your sewing machine and mod podge.
2. Work on the game board first. Cut out 1 ¾” squares from two pattern papers. I was able to fit 36 squares on my paper. Adhere the squares on the board*.
*I only used adhesive in the centers of the squares since I was planning on sewing around the edges of each square.
3. Add some zigzag stitching on the edges of each square. 


4. Punch out 12 1 ½” circles from two pattern paper. You will need 24 circles in all.
5. Adhere the circle papers on top of the chipboard shapes. Add Mod Podge on top of the papers (over the chipboard) to make sure it won’t peel off the chipboard shapes. Set aside to dry.
6. Now you need to create the envelope to store the game pieces and board. Pick two papers. Cut out a window in the middle of one of the papers. Mine measured 9 ½” square. Cut a piece of plastic and sew over the cut out window of the paper. Sew the paper with window, to the 12x12 piece leaving the top open. Punch out a circle on the center of the top of the envelope. Embellish the front of the envelope.
7. Create a title for your envelope. I layered some papers and letter stickers from the Special Delivery line.
8. Slip the board inside the envelope. Place the game pieces inside a plastic bag and secure inside the envelope with clips.

and here's some more close ups of the finished project... 


Checkers set
Size:  Envelope storage 12x12; Checkers board- 11x11; Checker circles- 1 1/2”
Products used:
Special Delivery (#2040 Dillon; #2041 Heidi; #2042 Guido; #2043 Jack; #2044 Sincerely Yours; #2045 Bradley’s Travels; #2051 Alpha Stickers; #2052 Label Stickers; #2053 Brads; #2054 Paper Clips; #2055 Die cut borders)
Other supplies: Chipboard circles, Thread, Sewing Machine, Ribbon, Corner Rounder; Circle punch; Adhesives.

Thanks for stopping by.

Till next time,
Grace

Tuesday, June 18, 2013

She is a true princess (Maddie's recital)

Tuesday, the second day of the week. How's yours coming along? Hope it's turning out to be inspiring. 
As for me, I'm pretty close to a headless chicken running around. Because I try to organize my life, I'm not there yet, but I'm almost there. I got a ton of things going on this week and I'm not going to bore you with it. What I am going to share is our family's first experience with recitals. 

In January, we signed up Maddie for the Colorado Springs Singers Company. It was being run by a good friend of mine and I liked the concept of the Singers group. They promote fun and "drama" less dance and singing company. These girls work on their songs and dances for a few months culminating to a recital at the end of the season. There is no competitions, just girls having fun and gaining confidence while singing and dancing their hearts out. Fun stuff! More info can be found here

Anyways, Maddie's group had their recital about two weeks ago. They performed twice. Once for a senior home and the other performance was held at a church where friends and family were invited. 

Here are some photos capturing that event...


Maddie's group worked on songs and dances with the theme of "true princess". They did cute upbeat music and some ballads including the song in Mulan, "Reflections". I didn't get much pictures of the recitals as I was doing videos as well. One of these days, I'll share them, but for now you'll have to be happy with picture share (no time for video edits and things like that)

and here's Maddie with her dance/singing teacher, Ms. Lachelle. 

It was definitely a neat experience. My daughter was given opportunities to break out of her shell and gain much needed confidence. Right after the final recital, Maddie asked me when Singers group starts up again. You can tell this was a good experience for her cause she's already asking for the next round. 

Fun stuff. What about you? What fun recital memories do you cherish?

Till next time,
Grace

Monday, June 17, 2013

Cards galore

Happy Monday friends. Hope you all had a great Father's day weekend. We treated hubby with an early celebration on Saturday and tried a new Mexican place in town. He LOVES Mexican food and sad to say, but we haven't really found any restaurants here that were comparable to the tastes of SoCal Mexican joints. I'm telling you, we've been spoiled in Southern California because of the multiple cultures that reside there. 

Anyways, I'll share pics of that later on but today, I'm starting this week's blog posts with some card shares. These were created for some of the design teams I work for. 

Princess Wishes on Your Special Day card. 
Have you seen the latest die cut releases from Die-Versions? If not, check them out here! They are perfect for the Summer season. Sun, sand and water. What a perfect combination. 
In this card, I decided to turn the intricate sand castle die into an effective image for my "princess wishes" sentiment. I love how I can turn the dies into something that they're not usually used for. It just shows you that with a little bit of imagination, you can stretch your dies and use them in new ways. 

Dad, You are Awesome card
I created some Father's day cards for Epiphany Crafts and here's the first one. I used the star and oval tool, plus an oval bubble accent. I dressed up the accent by adding the letters to spell out dad first before adhering the sticker on the paper. It gives an added dimension to part of my title. 

Love you dad card
Here's my second card for Epiphany Crafts. I love, love, love the Hexagon shapes. They are so hip and on trend. Perfect for that cool dad in my life. :)

Anyways, thanks for stopping by and make sure you stop by the Epiphany Crafts blog here and the Die-Versions blog here to learn more about these projects and products. 

Have a great Monday.

Till next time,
Grace

Friday, June 14, 2013

Cottonwood Lake Camping

Over a week ago we decided to go on a little camping trip. Mitch was assigned a special "job" at church to organize this year's Youth Conference. It's like a retreat but for the teenage group of our church. This is usually done on a bigger scale which we call stake level but this year, our stake gave the responsibility of putting this together on the individual wards. 

Anyways the spot chosen for this event was Cottonwood Lake. Minutes before we headed out for our camping trip, we found out through an email that our bishop (church leader) changed the location. We still wanted to take this time to explore the area so we went ahead even with the change of venue. 

Cottonwood Lake is a few miles outside of a little town called Buena Vista. It's about 2 1/2 hours drive west from Colorado Springs. We only did an overnighter because of work commitments but it was worth the drive. Here are some photos from our trip...

We arrived at the lake after lunch. We didn't want to spend the money on the formal campsite so we drove around the area looking for "free" spots. We are a family who loves free things. *wink*

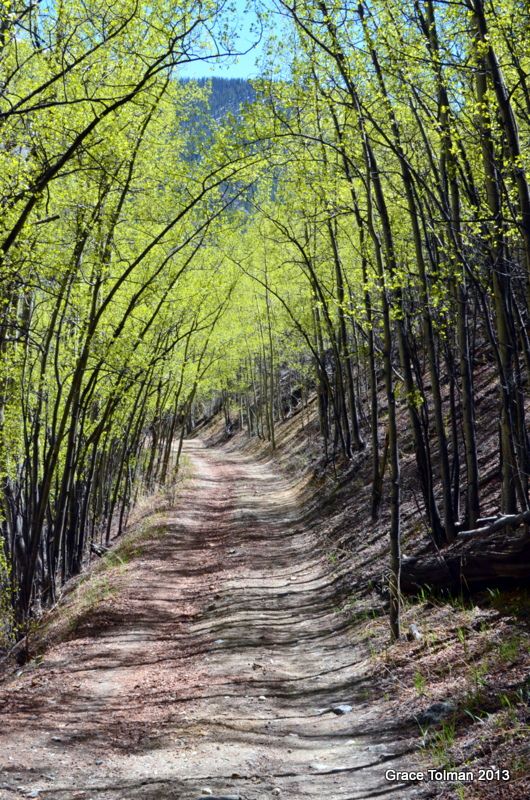
The great thing about having a 4-wheel drive truck is that you have more courage to tackle off-roading. In this trip we explored the hills with our truck. Look at this really cool spot along the trail. Don't you just love how the tree branches creates an arch for the trail? So pretty!

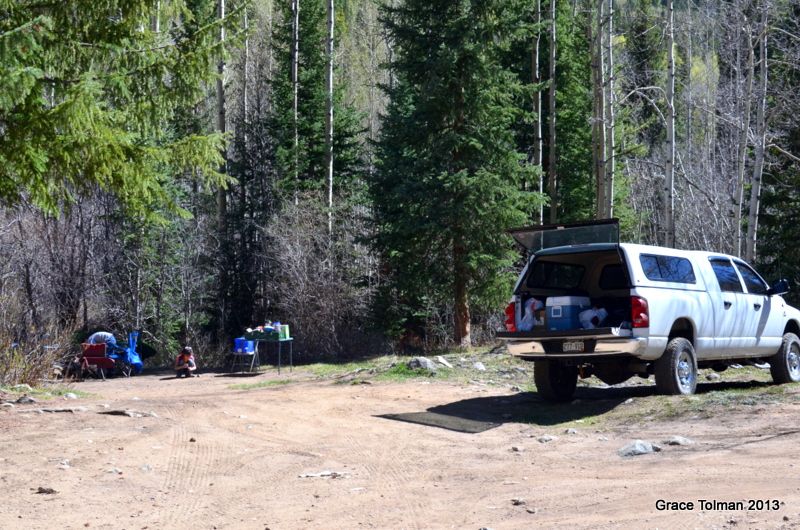
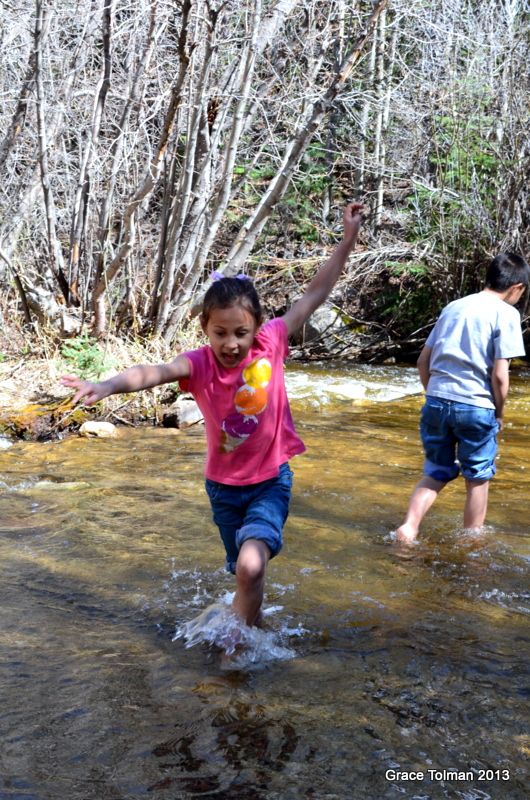
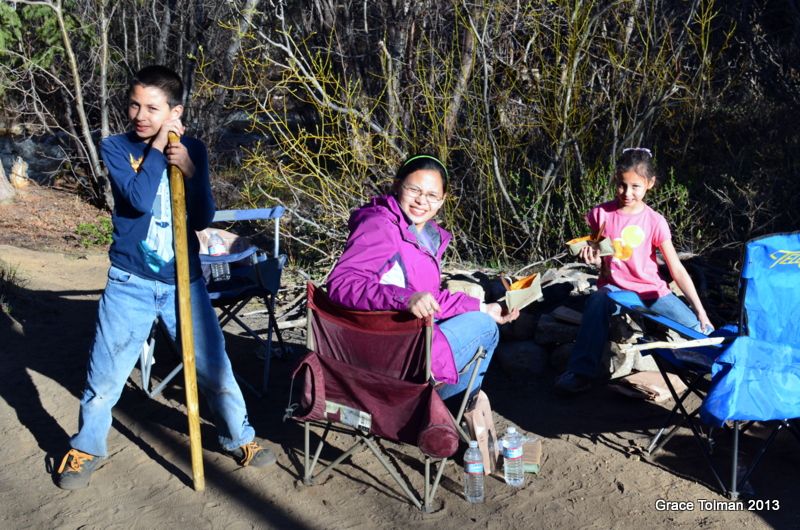
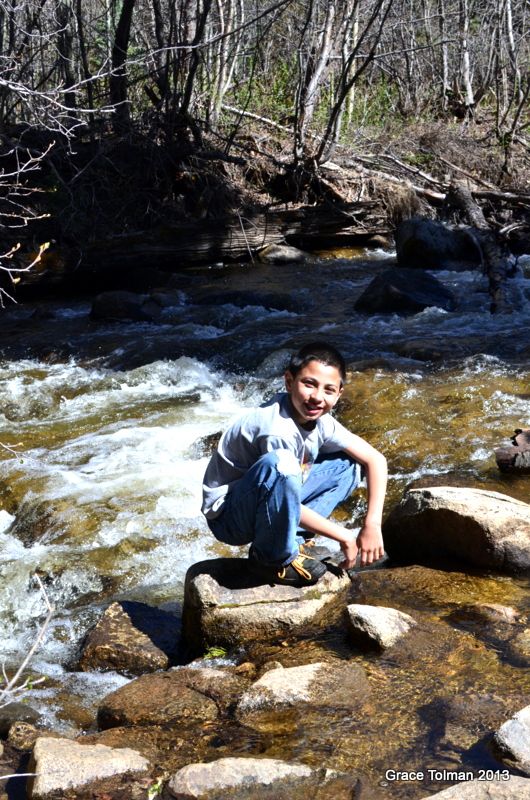
After about an hour or so of driving around and exploring, we finally found our camping spot for the day. This free camping area was located off the main road and we were only yards away from a stream. If this was a hot summer day, I would say that we hit a jackpot. The water was still cold but the kids didn't mind. They waded in the stream, but only for a little bit. I was a bit concerned that they would get sick playing in icy water but thankfully they are resilient and healthy. 


Once we got to the campsite, we went exploring around the area while picking up sticks for our campfire. It was good that the conditions were favorable enough that they allowed campfires. 

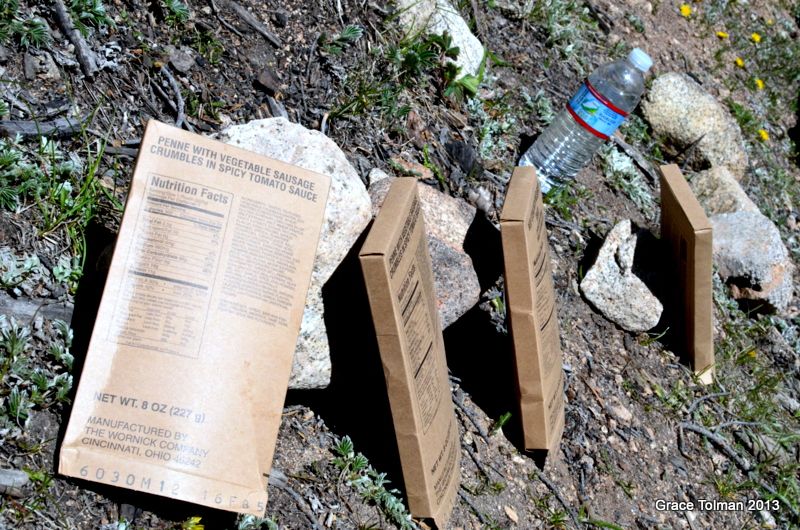
Because this was kind of a last minute plan, we made thing easy by bringing MRE's for our dinner. The military issued "meals ready to eat" are one of our favorite camping foods. Everyone can choose which meal they want and the kids love discovering the treats and snacks, each pack contains. 

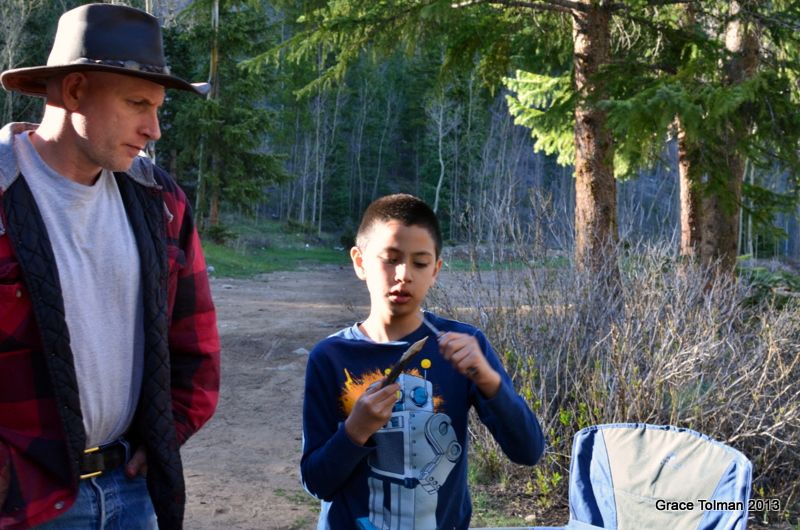
We are definitely blessed to have a former Scoutmaster in our family. In this trip, Mitch taught Marcus proper knife safety and taught him how to whittle a point on a stick. Marcus was so proud of his achievement that he didn't was us to add the stick to our campfire pile. He even brought it home. 

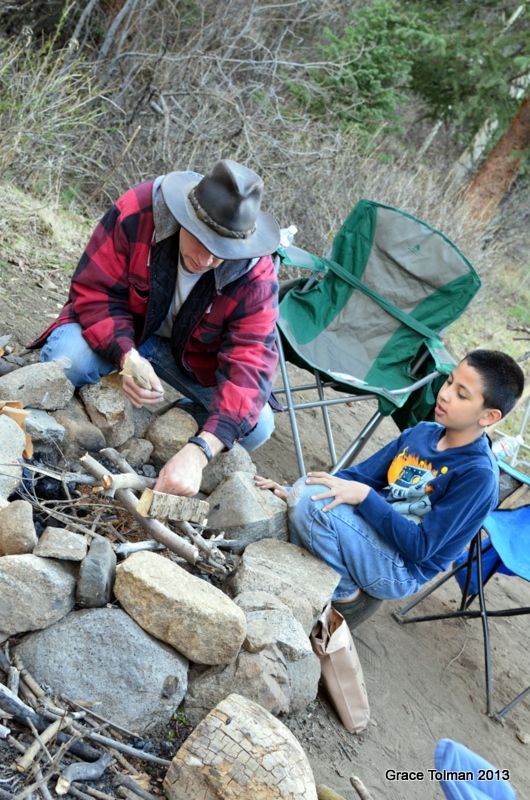
Mitch also taught Marcus how to properly light a campfire. I'm always confident that we will have a great and safe time camping because we have our very own Outdoor expert in tow. He even noticed a tick on Marcus' shirt that we quickly killed. After that we were very cautious coming too close to bushes and shrubs. I'm telling you, if it were me,I would totally be clueless surviving in the great outdoors. 


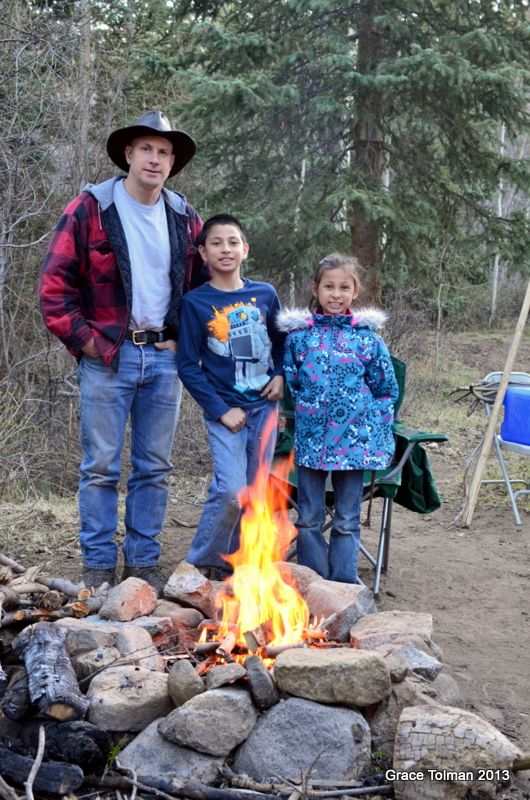
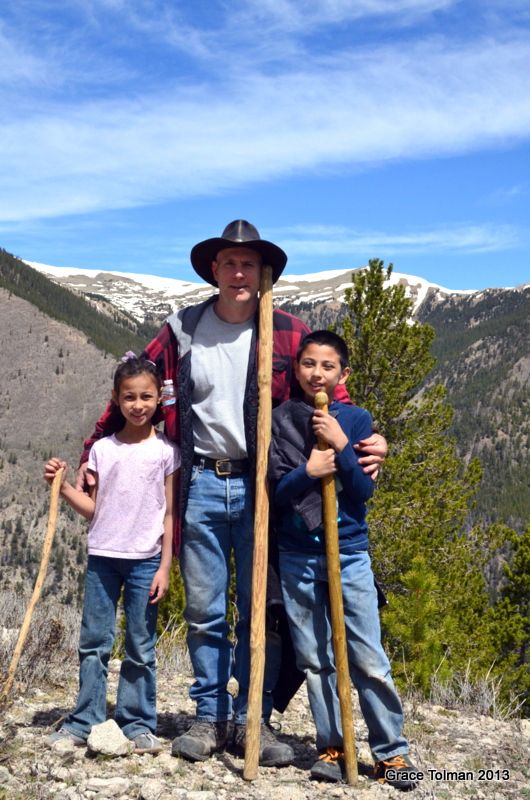
After the camp fire was properly lit, it was picture time...


We spent the night staying warm around the campfire. We made s'mores and shared stories. When it got a bit cold, we headed into our truck and played card games. When we were done with that, we turned the truck into our very own rv/trailer.  The kids slept inside their sleeping bags in the cab (seats folded down) while Mitch and I took the bed of the truck. The surface was a bit hard for my liking and the temperature was cold but we survived. 

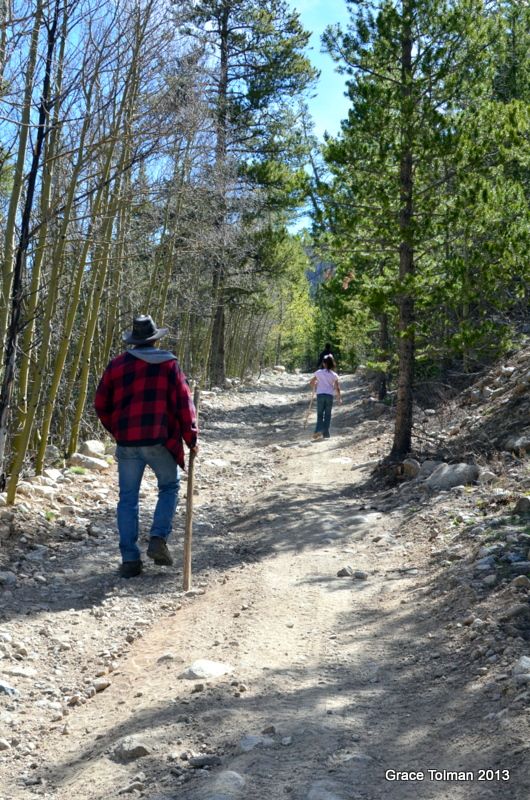
In the morning, we had some boiled eggs for breakfast and another campfire. Nothing beats a chilly morning than seating by a hot burning fire. After that, we cleaned up, packed our truck and then headed for a trail nearby. We weren't sure where this trail lead to but we hiked up till we couldn't anymore. 


I don't mind hikes but I can tell that we were getting up to some high elevations because I was panting a bit more and was having a hard time breathing. Even the kids were getting close to their giving up point. 


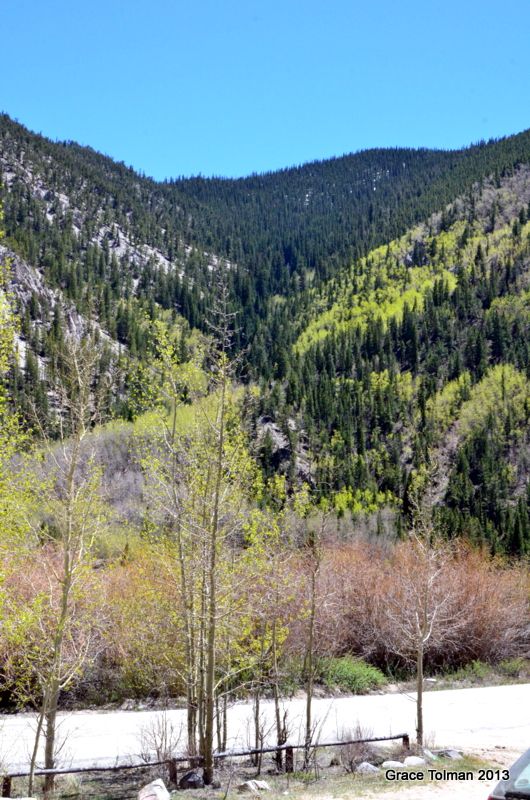
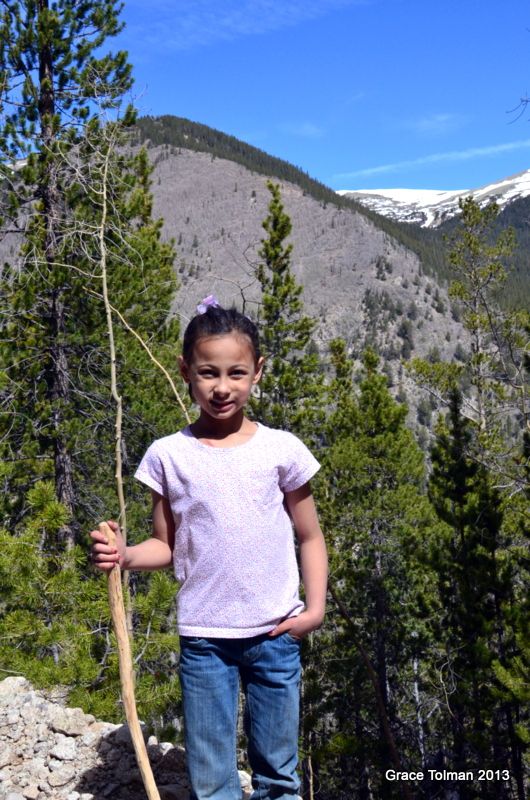
Finally we got to a point in the trail were we felt it was a good spot to stop, take pictures then turn around back down the mountain. This was that spot. I'm pretty sure we were at least over 11,000 feet with how we can clearly see the top of the mountains nearby. 


Once we got back down, we had some lunch. On the menu...more MRE's. 

After that, we drove home and thankfully found everything well when we arrived. 

It's so great to have this time with the family and enjoy nature. We are definitely blessed to be surrounded by beautiful mountains and lakes. Cottonwood lake is a place we would definitely like to visit again 

As I went through the photos for this blog post, I realized that I didn't even photograph the actual lake. Ha! Well that's definitely something to capture next time. 

Thanks for stopping by.

Till next time,
Grace